
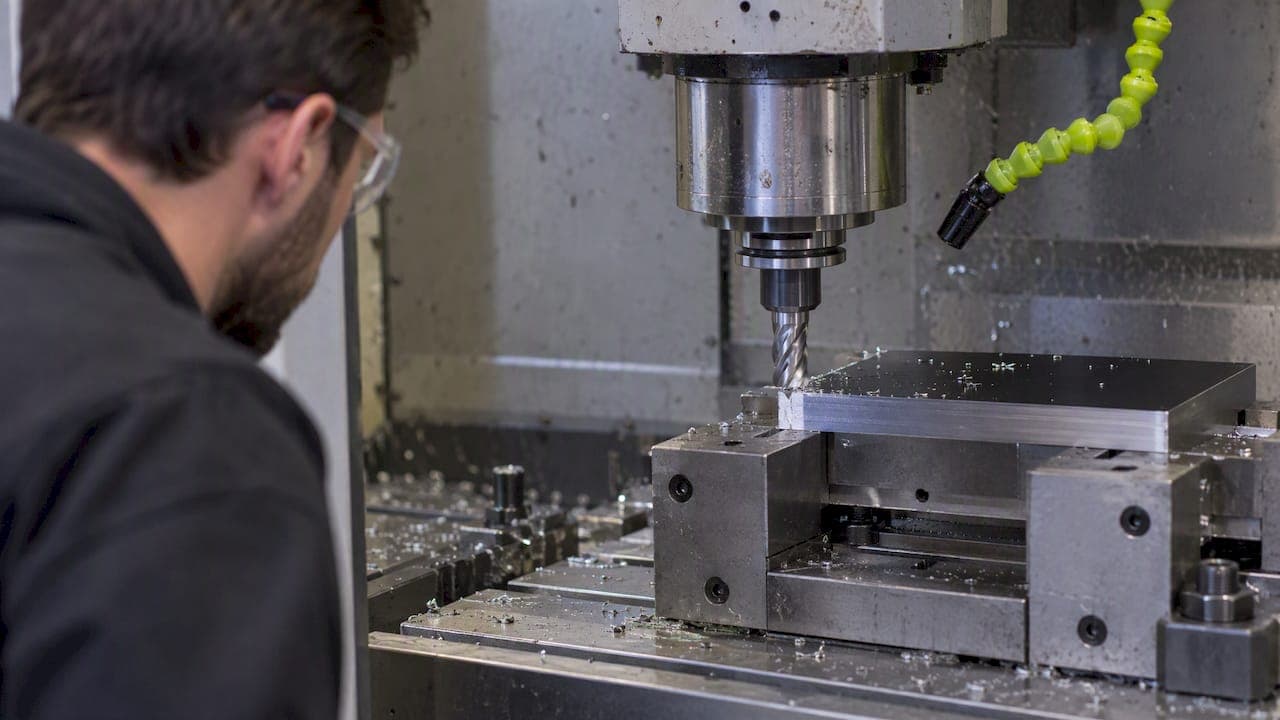
Machine before you coat whenever you can. Coatings such as hardcoat anodize are hard, abrasive and dimensionally stubborn, so cutting them costs tool life, edge quality and sometimes the finish itself. But there are real cases where you have to cut a part that is already coated: a bare-metal contact face, a hole that must land exactly, a bracket modified late. This guide covers when post-coat machining is the right call, how to hold and cut the part, what happens to dimensions, and what to do about the exposed metal afterward.
TL;DR
- Do as much machining as possible before hardcoat anodizing. The hardcoated surface is roughly 50+ Rockwell C, which wears tools much faster.
- Machining after coating is justified when the final location, size or fit of a bare-metal area is critical. Plan it as a deliberate step, not a rescue.
- Use sharp carbide, lower spindle speed, lubricant and light cutting force. Support the coating at the cut so it does not chip or flake.
- Coating adds thickness. Decide on the drawing whether each dimension applies before or after finish.
- Cutting aluminum creates fine dust. Collect it properly and keep it away from ignition sources.
Why the order of operations matters
The default sequence in a machine shop is simple: cut, deburr, finish, inspect. The reasoning is physical. The Aluminum Anodizers Council (AAC) advises doing as much machining as possible before hardcoat anodizing, because a hardcoated surface sits at about 50+ Rockwell C and causes substantially greater tool wear. A standard end mill is not built for that.
Appearance follows the same logic. AAC's technical bulletin explains that mechanical finishing such as polishing, sanding, blasting or shot peening is performed before chemical finishing or anodizing, since anodic oxide follows the underlying texture and reveals its defects. Tool marks and scratches do not disappear under the coating. They show through it. If surface uniformity matters, our own notes on bead blasting before anodizing go deeper on preparing the surface.
So the baseline is clear. Machining after coating is the exception, and it needs a reason.

When machining after coating is the right call
There are four common situations.
- Bare-metal contact areas. Grounding faces, electrical contacts and bonding surfaces need uncoated metal. You can mask them during coating, or you can cut the coating off afterward. Masking is generally the economical choice. Cutting it away is better when the exact location, size or fit of the bare region is critical, because the toolpath controls the exposed area directly. The tradeoff is an extra setup and a risk of chipping at the cut boundary, as described in one finishing shop's comparison of masking and machining.
- Tight-tolerance features that coating would disturb. Bores, pilot diameters and thread starts can move out of tolerance during finishing. Sometimes the cleanest fix is a final finish pass after coating.
- Late design changes or repairs. A coated part that needs one extra hole, a flat or a slot is cheaper to modify than to scrap, as long as you accept a bare edge there.
- Fit-critical assemblies. If a coated part must mate with another part and the stack-up is tight, trimming after coating can be more predictable than predicting the coating's growth.
If none of these apply, go back to the drawing and move the operation ahead of the finish.
Masking versus cutting it off
Masking keeps the coating from forming where you do not want it. It adds handling and needs careful control, and we cover timing in our guide to the dwell time for anodize masking on CNC parts. Post-coat machining removes finished coating on purpose.
| Factor | Masking | Machining after coating |
|---|---|---|
| Cost | Generally lower | Extra setup and cutting time |
| Location and size control | Depends on mask accuracy | Set directly by the toolpath |
| Edge risk | Mask line may be soft | Chipping at the cut boundary is possible |
| Best for | General bare areas | Critical fit, electrical contact or final dimension |
Another point that gets missed: removing coating also removes local corrosion protection. The exposed area should be a deliberate functional requirement, not an accident, a point made clearly by a finishing shop discussing this exact trade.
Anodize, powder coat and paint behave differently
The word "coating" hides very different materials.

Hardcoat anodize is a converted layer of aluminum oxide, not a paint on top. It is hard and abrasive, which is why it punishes cutters. How thick it is matters a lot for both tool wear and dimensions, so read our hardcoat anodize thickness spec guide before you pick a callout.
Thin decorative anodize is a lighter layer. It is still harder than the base aluminum, so carbide is the sensible choice. One finishing-shop guide recommends carbide tooling for anodized aluminum because the anodic layer is harder and more abrasive than the metal under it.
Powder coat is a baked polymer film. It is softer than anodize but it can chip and flake at a cut line if adhesion or surface prep was imperfect. Machinists on forums commonly choose to remove it locally before cutting rather than cut through it, which is a reasonable approach for a one-off.
Conversion coatings such as chromate conversion are thin and conductive. They are a different animal from anodize, and the choice between them has consequences for corrosion and electrical performance. Our Alodine versus anodize decision guide lays that out, and meeting MIL-DTL-5541 Class 3 for conductivity covers the electrical case.
Plated finishes like electroless nickel add a hard, uniform layer of their own. See our electroless nickel on aluminum spec guide for how that changes the plan.
Holding a coated part without damaging it
Fixturing is where most surface damage happens, long before the cutter touches the coating.
- Pad the jaws. Buehler's guidance for coated specimens recommends padding clamping surfaces with a softer material and supporting both sides of the cut. Soft jaws, shim stock or aluminum-friendly tape all follow the same idea.
- Keep the coating under compression. The same source advises orienting a coated piece so the blade enters through the coating and exits through the substrate. Compression at the coating reduces delamination and fracture. In milling terms, think about which way the cutter exits the coated edge and avoid pulling the cutter out of the coating from beneath.
- Back thin coatings. For thin layers such as anodize, a metallography procedure recommends a precision diamond wafering blade with the coated surface supported against a backing block to reduce edge chipping. That is a lab method for sectioning samples, but the principle carries to shop work: support the coating right at the cut.
- Mind your datum. If the part will be re-fixtured for post-coat work, pick datums that are not coated surfaces you must hold to a tight tolerance, or machine bare datum pads before coating.
Stability matters in the finishing stage too. A powder coating guide from The Fabricator points out that a fixture must hold the part securely with a consistent ground, because movement changes electrical contact and coverage. The lesson for the machinist is that fixture decisions made at the coating stage carry forward into your post-coat work.
Cutting anodized aluminum cleanly
The second query readers type is how to cut anodized aluminum, and the short answer is: sharp carbide, slow and steady, with lubricant.
Tooling
Use carbide. A finishing-shop guide also recommends a high-helix tool with a sharp, polished edge to reduce friction and heat. A dull tool rubs and burnishes the oxide instead of shearing it, and that heat cracks the layer at the edge.
Speeds, feeds and lubricant
Reduce spindle speed compared with bare aluminum, use coolant or lubricant, and apply gentle cutting force to limit heat, cracking, splitting and flaking. Speed and feed depend on material, hardness, tool grade and the machine. One cutting-tool maker notes that excessive speed causes overheating and premature wear, while insufficient feed makes teeth rub. There is no universal number, so start conservative and listen to the cut.
Hand and shop saws
For sawing anodized extrusion, one manufacturer's handling guide recommends a carbide-tipped aluminum blade with at least 60 teeth and negative rake on a mitre or table saw, an aluminum-specific 8-TPI HSS jigsaw blade for curves, or an aluminum-rated cut-off wheel on an angle grinder. It also says to keep work clamped, leave protective film on, lubricate with cutting wax, cut slowly with steady pressure, and clear swarf after each cut without dragging it across the finish (Knotwood cutting guide). That is written for architectural extrusion, not precision parts, but the finish-protection habits apply.
Alloy matters
AAC notes that alloy and temper affect machinability, anodizing response and appearance, and that 6061 is a high-strength alloy with excellent machinability and anodizing response, a favorite for hard-anodized parts. If you are still choosing material, our comparison of T6 versus T6511 aluminum covers what each temper means on the machine.
Surface integrity is also not controlled by one parameter alone. A University of Utah thesis reports that work material, tool geometry and coolant interact to shape residual stress. In practice that means you change one variable at a time when you tune a post-coat cut.
Dimensions: coating changes the part
Coating is not zero thickness. Anodize grows both into and out of the surface, and hardcoat grows more than a decorative layer. The drawing should say plainly whether each dimension applies before or after finish. Features that must be exact after coating may be machined undersize, masked, or finished after coating.
Two rules keep this manageable:
- Call out the basis. Write "after finish" or "before finish" next to critical dimensions and thread callouts.
- Inspect after finishing. Measure coating thickness on the part and check fits and threads after coating, not before.
Threaded holes are the usual casualty. If you tap before anodizing, the coating narrows the thread. If you tap after, you cut through coating and leave a bare thread. Both can be right, depending on the job. Our guide to tapping aluminum covers drill sizes, taps and lubricant, and the page on threadlocker on aluminum explains how to retain fasteners in a coated or bare thread.
Plan the whole chain backward from final requirements. One process guide recommends coordinating drawing review, datums, fixturing, machining sequence, masking, coating and final inspection instead of treating the coating as an independent last step (coated-parts planning guide). That is exactly the thinking that avoids rework.
A short pre-cut checklist
- Is machining after coating really necessary, or can the feature move ahead of the finish?
- Is the exposed bare metal a stated requirement?
- Is the cutter sharp carbide, and is the cut set up so the coating edge is supported?
- Do the drawing notes say before or after finish for each critical dimension?
- Is the final inspection plan written down: critical dimensions, bores, threads, coating thickness, coverage, adhesion, appearance and assembly fit?
Protecting the exposed edge afterward
Cutting through anodize leaves bare aluminum. The good news is that aluminum forms its own oxide quickly. A European processing guideline for anodized sheet states that the cut surface oxidizes naturally and rapidly, giving the cut edge a degree of protection. That is enough for a mild indoor environment, but not a substitute for coating in a wet, salty or dirty one.
If the exposed area will see weather, mud or wash water, you have three options: leave it bare and accept the exposure, apply a local touch-up such as a chromate conversion treatment suited to your spec, or send the part back for a full re-finish after the final cut. Which is right depends on the application. If the bare area is a functional contact, protect it by design, with a gasket, grease or a plated mating face. The key is the choice is yours, made on purpose.
Processing sheet has its own edge rules too. The same European guideline advises avoiding excessive pressure that can damage the anodic layer, cleaning the line of aluminum particles, and using lubricant during leveling.
Safety when cutting and grinding coated aluminum
This is the part people skip. Sawing, cutting, grinding and sanding aluminum can generate fines, and some are fine enough to be potentially explosible. The Aluminum Association recommends suitable wet or dry collection, grounding, avoiding ignition sources, and a dedicated collection system for aluminum dust that never mixes it with dust from other metals. Sparks from a grinder near a pile of fines is the worst combination.
Coolant mist is a separate hazard. OSHA reported in 2019 that workers exposed to airborne metalworking fluids during aluminum machining developed occupational hypersensitivity pneumonitis, and stressed good hygiene, fluid management and evaluation of respiratory hazards. If you run flood coolant or mist, ask your safety lead or an industrial hygienist about ventilation and respiratory protection, and wear eye protection whenever you cut.
Our perspective
We machine parts in a single shop in Athens, Alabama, and the machinist who designs a part is the one who cuts it. That changes how we think about coating. When the same person sees the drawing, the fixture and the finish requirement, the sequence gets decided at the start, not discovered at inspection.
Our rule is simple. Every feature gets a home before the coating step if it can have one. Post-coat cuts are for features where final position or fit demands it, and we write them into the plan with the bare area stated. We would rather talk a customer out of an unnecessary post-coat operation on the first call than rework a chipped edge after.
If you are sending out prototypes or short runs, tell us the finish early, which dimensions are critical after coating, and which areas must stay bare. Those three answers prevent most of the problems in this article.
— Drake
Work with us on coated parts
If you have a part that needs machining, coating and perhaps one more careful cut after, we handle prototype machining, short-run production, and fixtures, brackets and support parts from one shop, with direct access to the machinist for quick revisions. Send us the drawing and the finish callouts through our CNC machining services and we will tell you the best order of operations.
Riders can also see what that approach produces in the E2 Kickstand for the KTM SX-E 2, GASGAS MC-E 2 and Husqvarna EE 2, a bolt-on CNC-machined stand priced at $100–$105. For production shops, our guide on building Level 3 PPAP in seven steps shows how we document finished parts.
FAQ
Can you machine anodized aluminum?
Yes, but it is harder on tooling than bare aluminum. Use sharp carbide, reduce spindle speed, add lubricant and keep cutting force light. Hardcoat is the toughest case at roughly 50+ Rockwell C, so do as much cutting as possible before anodizing.
Can you machine a powder coated part?
Yes, though the coating can chip or flake at the cut if adhesion is poor. Many machinists strip or relieve the coating locally first, support the part near the cut and use sharp tools. Expect the cut edge to be bare metal afterward.
Do I need to touch up bare metal after cutting through anodize?
Not always. Aluminum oxidizes quickly and gives the cut surface some protection. In wet, salty or outdoor service, plan a local treatment or a re-finish, and treat the exposed area as a deliberate design decision.
Does anodizing change part dimensions?
Yes. The layer grows into and out of the surface, so shafts get slightly larger and bores slightly smaller. State on the drawing whether dimensions apply before or after finish, then measure coating thickness and check fits and threads after anodizing.
Is cutting coated aluminum dangerous?
It can be. Sawing, grinding and sanding create aluminum fines that may be explosible, so use dedicated dust collection, grounding and no ignition sources. Manage coolant mist too, and ask a qualified safety professional about respiratory protection.
Sources
- A Conclusive FAQ Guide for Anodized Aluminum, AAC
- AAC Technical Bulletin: Specifying Anodized Finishes
- Bare-Metal Contacts on Anodized Parts: Masking vs Machining
- Anodized Aluminum Machining Tips and Techniques
- Buehler: Thermal Spray Coatings
- Metallographic.com: Preparation of Class 7 Coatings and Surface Treatments
- The Fabricator: A part presentation primer for powder coating
- Knotwood Cutting, Storage and Handling Guide
- Caleyron: Cutting parameters for HSS and solid carbide circular saw cutters
- University of Utah: Surface integrity in machined aluminum alloys
- Processing Guidelines: Cut-to-length and protection of cut edges
- CNC Machining for Coated Parts: Key Considerations
- Aluminum Association: Aluminum Fines Generated
- OSHA: Department of Labor cites Wisconsin Aluminum Castings