
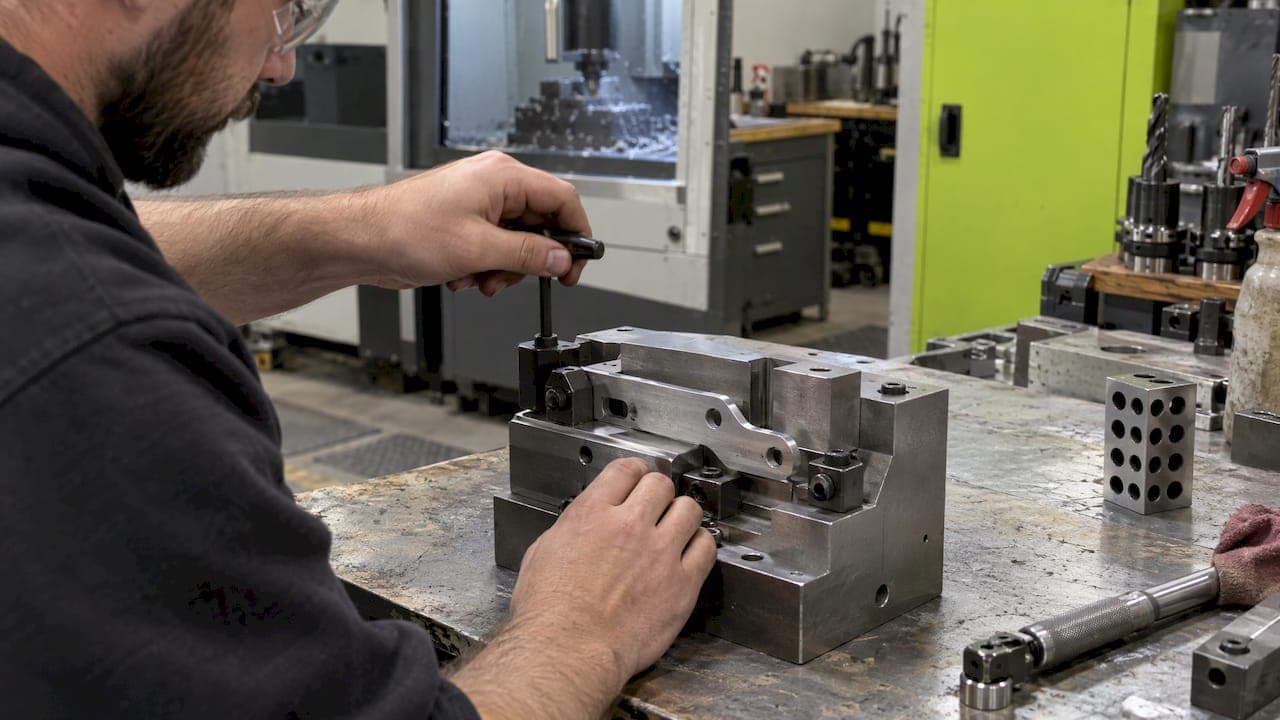
A poka yoke fixture is a work-holding or assembly fixture built so the part can only be loaded the right way, or so a wrong load is caught immediately. Poka yoke is Japanese for mistake-proofing, and ASQ pronounces it PO-ka yo-KAY. In a fixture, that usually means an offset pin, a keyed slot, a stop or a sensor that makes the error impossible or immediately obvious instead of relying on the operator to remember.
This guide covers what these fixtures are, the main types, real examples, how to design and test one, and where machined fixtures fit in. It is written for engineers and shop owners who have to make the part and hold it too.
TL;DR
- A poka yoke fixture prevents a loading, orientation or sequence error, or detects it before the defect moves downstream.
- Passive designs (geometry such as offset pins and asymmetric holes) beat active ones (sensors) when both are practical, because there is nothing to fail or bypass.
- Design starts at the station: watch the work, name the error in physical terms, then pick the simplest method that blocks it.
- Test every device with a known-bad part, and keep it cheap, simple and fast so operators do not work around it.
- We machine fixtures, brackets and support parts, with direct access to the machinist who builds them.
What a poka yoke fixture actually does
The idea is simple. A person loads a part, and a person can load it backwards, rotated, or with a feature missing. A poka yoke fixture removes that choice. ASQ describes mistake-proofing as an automatic device or method that makes an error impossible or immediately obvious once it has happened.
That gives two jobs:
- Prevention. The fixture will not accept the wrong orientation, the wrong part or the wrong sequence.
- Detection. The fixture allows the error but flags it at once, so a defective part never reaches the next step.
Prevention is the stronger of the two. Detection is what you use when geometry alone cannot stop the mistake.
The main types of poka yoke fixture designs
There are two common ways to sort these devices: by how the fixture works and by how it responds.
Passive and active
Research on mistake-proofing from Chase and Stewart classifies fixture designs as passive (geometric or physical) or active (sensor-based). A passive fixture is a pin, a notch, a tapered guide or a keyed pocket. An active fixture uses a powered device, such as a switch or presence sensor, to detect a problem.
Passive designs are generally treated as the ideal, since they remove failure modes that an active system can have, such as sensor failure or someone bypassing it. That is a practitioner view, but it matches shop experience: a hardened pin does not drift out of calibration.
Warning and control
The same source separates devices that warn (alert) from those that control (block). A light or buzzer is a warning. A fixture that will not close, or a machine that will not cycle, is control. A warning only works if someone notices it every time, so use control wherever you can.
Contact, fixed-value and motion-step
The same paper groups methods by what they check:
- Contact: physical sensing of shape, size or presence.
- Fixed-value: counting, so a step is not complete until the right number of items or actions has happened.
- Motion-step: verifying that steps happen in the right order.
When the check happens
ASQ also frames it by timing. Source inspection checks conditions before a process step, self-inspection checks work immediately afterward, and successive inspection happens at the next step. For fixtures, source inspection is the most useful: confirm the part is right before the cutter or the fastener touches it.

Examples you can picture on a shop floor
The most common examples are small and cheap. A LeanSuite list of examples includes fixtures with offset locating pins, go/no-go gauges, part-present sensors, kit trays with defined pockets, shadow boards and screwdrivers that count screws.
Machine Design's older but still useful article adds two more: nonsymmetrical hole patterns that prevent incorrect part orientation, and a proximity switch that keeps a wrench locked out until a gearbox has been filled with oil.
Here is how those translate into machined fixtures:
| Error to prevent | Fixture feature | Type |
|---|---|---|
| Part loaded rotated 180° | One locating pin offset from the pattern center | Passive, control |
| Wrong part variant loaded | A pocket or keyed slot that only the correct profile fits | Passive, control |
| Missing hole or feature | A pin that will not seat if the feature is absent | Passive, control |
| Part not fully seated | Part-present sensor wired to the clamp or machine start | Active, control |
| Wrong number of fasteners installed | Counting tool or tray with one pocket per fastener | Fixed-value |
| Steps done out of order | Interlock that releases the next tool only after the prior step | Motion-step |
A machined-fixture example
Take a bracket with two holes that are symmetrical except for a small tab. Without a poka yoke, an operator can flip it and clamp it. Drill a flipped bracket and you scrap the part. Now add a third locating feature, a small relief that only accepts the tab side. The bracket drops in one way. No sensor, no software, no training reminder.
That is a design choice you make while you draw the fixture, and it costs a few minutes of machining time. Our guide to fixture design basics for engineers covers how locating features and tolerances hold up over thousands of cycles, and the same locators can do double duty as error-proofing features.
How to design and implement a poka yoke fixture
A workable process, based on the Kaizumi guide to building and testing devices, looks like this:
- Watch the station. Spend time at the actual job, not in a conference room.
- Name the error in physical terms. Not "operator carelessness," but "part can be loaded 180° out" or "left and right variants share a pocket."
- Choose a method. Start with the simplest geometry that blocks the error.
- Mock it up and try it. Cardboard, 3D prints or soft-jaw scrap work well.
- Make it permanent. Machine it in the final material.
- Add it to standard work. If the work instruction does not mention it, the next revision will quietly remove it.
Eliminate first, detect last
ASQ recommends considering elimination, replacement or facilitation before detection. Machine Design's Munro takes it a step further: design the parts so they fixture themselves to one another, because fixtures can paper over a bad design but add cost. If you control the part design, add an asymmetric feature to the part and the fixture becomes simpler.
This is where datum choices matter. If your datum scheme is ambiguous, the fixture will be too. Our three checks for GD&T datums is a good companion before you cut any locating geometry.
Involve the people who use it
The Lean Enterprise Institute argues that effective poka-yokes are best developed as part of a kaizen process instead of being imagined in isolation by manufacturing engineers. The operator knows which loading mistake actually happens on third shift. Ask.
Passive geometry versus sensors
Sensors have a place. IC tags, sensors and image recognition can identify parts and detect errors without direct contact, which helps when many variants run through one station or when the error cannot be expressed as a shape. Compare the trade-off between fixed geometry and sensors, interlocks and alerts that detect or prevent process errors: geometry costs nothing to run, while sensors give you flexibility and data.
A practical rule:
- If a pin, key or stop can block the error, use that.
- If the error is "something is missing" or "count is wrong," use a presence or counting device.
- If variants change often, consider modular fixturing with swappable keyed plates. Our modular fixturing setup guide and quick-change fixturing article cover how to change over without losing repeatability.
Testing: the red rabbit
A poka yoke you never test is a hope. Kaizumi recommends that at the start of each shift you load a known-bad part, often called a red rabbit, into the fixture. If the fixture accepts it, the device has failed, and you want to know before the shift's first part, not after the first lot.
The same principle runs through quality work in other industries: the device is only trusted because it is routinely tested using a deliberately incorrect test part. Keep the red rabbit with the fixture, labeled, and out of the good-parts bin.
For machined parts, pair the fixture check with inspection. Our overview of machined part inspection methods and timing shows where to place checks, and probing for prototype testing can verify that the fixture itself holds position.

Benefits and limits to plan for
The Lean Enterprise Institute notes that poka-yokes can reduce complaints, but devices that burden operators, stop production often, give false positives or are unreliable can hinder production. Devices also carry investment and labor cost. The same source says good designs are cheap and simple, do not hinder the operator, and give quick, specific feedback.
Turn that into design rules for your fixture:
- Cheap and simple. One pin beats one sensor plus a PLC input.
- No extra work for the operator. Loading the correct part should be as easy as before, or easier.
- Fast, specific feedback. The part either seats or it does not. No guessing why.
- Hard to defeat. If a pin can be pulled out with a fingernail, it will be.
Perspective
We build fixtures for the same reason we build our own parts: a mistake at the bench is cheaper than a mistake in the field.
Because the machinist who designs the work is the machinist who cuts it, we can put the error-proofing in the first revision. An offset pin, a keyed pocket or a relief that only accepts one orientation costs very little to add while the fixture is still on the drawing board. It costs a lot more once parts are already in production.
Our view is that most shops reach for sensors too early. Start with geometry, test it with a known-bad part, and only then decide whether anything else is needed. If you can talk to the person making the fixture, that conversation takes minutes. That direct line is what we offer.
Drake
Getting a poka yoke fixture made
If you have a part that gets loaded wrong, or a station where variants get mixed, the quickest path is to send us the part and describe the mistake. We machine fixtures, brackets and support parts, along with prototype and short-run work, and you talk directly to the machinist.

Our own CNC-machined parts show the same approach. The E2 Kickstand for the KTM SX-E 2, GASGAS MC-E 2 and Husqvarna EE 2 is a bolt-on part designed for straightforward installation, listed at $100-$105. For quoted jobs, a drawing, a sample part and a sentence about what keeps going wrong is enough to start.
If you are still planning the layout, two related reads help: drill jig design for accuracy and fast setup and true position basics, both useful when deciding how tight a locating feature needs to be.
FAQ
What is a poka yoke fixture?
It is a fixture designed so a part can only be loaded correctly, or so a wrong load is caught immediately. It works through shape, such as offset pins and keyed slots, or through sensors. The goal is that the error cannot become a defect.
How do you pronounce poka yoke?
ASQ gives the pronunciation as PO-ka yo-KAY. The term is Japanese for mistake-proofing.
Is a sensor better than a pin?
Usually not. Passive geometry cannot fail the way a sensor can, and nobody can bypass it as easily. Sensors are the right answer when the error is a missing item, a wrong count or a sequence problem that shape cannot express.
How often should I test it?
The Kaizumi guide suggests at the start of each shift, using a known-bad part. Also retest after any repair, rework or change to the fixture.
Sources
- What is Poka-Yoke? Mistake & Error Proofing | ASQ
- Poka-Yoke Designs Make Assemblies Mistakeproof | Machine Design
- Mistake-Proofing Errors Out | Chase and Stewart
- 28 Poka-Yoke Examples, Everyday and Industrial | LeanSuite
- How to build and test a poka-yoke device | Kaizumi
- Why Create Poka-yokes and Why Disconnect Them? | Lean Enterprise Institute
- Mistake proof factory with Poka-yoke! | Ricoh