
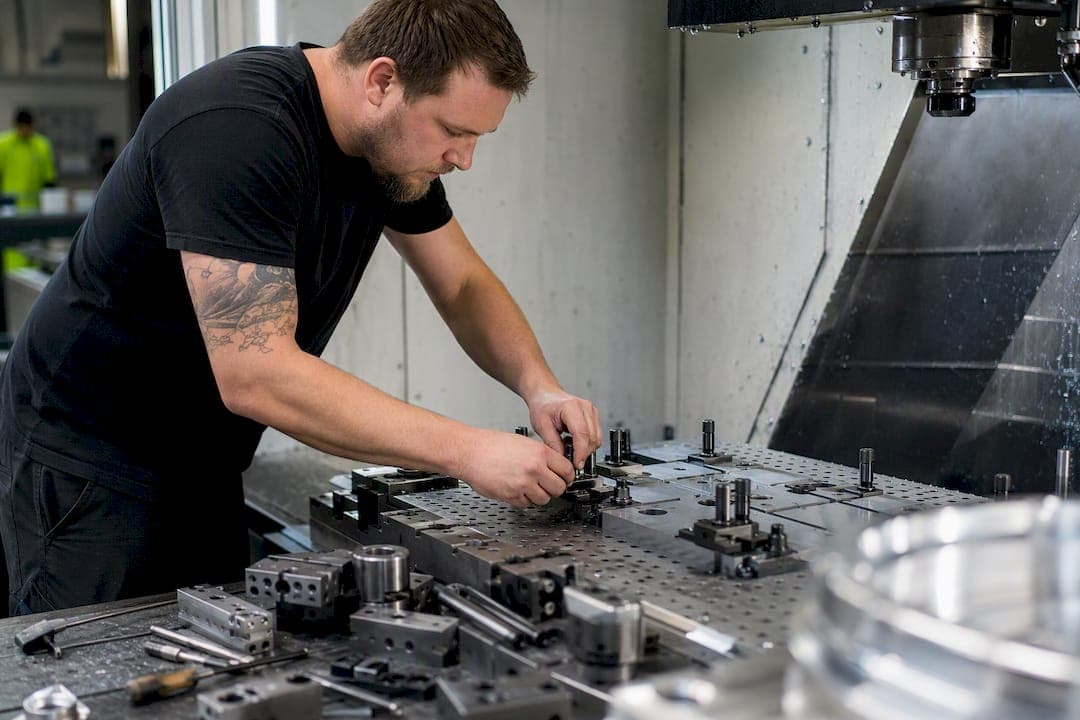
Modular fixturing is a reusable workholding system built from standardized plates, locators, clamps, and supports that bolt together in different configurations to hold different parts. Pick it over a permanent fixture whenever you're running prototypes, short to medium production volumes, or setting up parts for CMM and vision inspection where the geometry will change from job to job.
The system earns its keep on three fronts:
- Locating accuracy rests on the 3‑2‑1 locating method, which uses six contact points to fix all six degrees of freedom without over-constraining the part.
- Cost logic favors modular builds for shorter runs and favors dedicated tooling once volumes climb into the thousands, per the break-even comparison in stationary workholding research.
- Inspection compatibility comes from standardized grid bushings that let a fixture move between a mill, a CMM, and a vision station without losing repeatability.
Key Takeaways
Modular fixturing delivers repeatable, reconfigurable workholding by combining standardized locators, clamps, and grid plates instead of committing to single-purpose tooling.
| Point | Details |
|---|---|
| Definition and fit | Modular fixturing reuses standardized components for prototyping, short and medium runs, and inspection setups. |
| Follow 3‑2‑1 locating | Six contact points constrain all six degrees of freedom; extra locators cause over-constraint and distortion. |
| Direct force into supports | Locators and supports should carry cutting loads; clamps should only seat the part against them. |
| Know your break-even point | Modular tooling wins at low batch counts; permanent fixtures pay off once volume reaches the thousands. |
| Match system size to part | Confirm grid spacing, bushing style, and clamp capacity against part mass before ordering. |
| Flying Chip Factory approach | Flying Chip Factory uses modular fixturing for prototype and short-run jobs, giving engineers direct machinist access for fast reconfiguration. |
What Is Modular Fixturing and How Does It Differ From Other Workholding?
Modular fixturing is built from off-the-shelf components: tooling plates with standardized grid patterns, locating pins, modular blocks, and clamps that bolt and unbolt in minutes. The plates carry multipurpose holes combining an alignment bushing with a threaded insert, so a technician can relocate a clamp or locator without redrilling anything.
Compare that to a permanent fixture, which is machined or welded for one part number and one job. Permanent tooling holds tighter to extreme cutting loads and can be faster at the machine once it's built, but it costs more upfront and sits idle between runs. General-purpose workholders (vises, chucks, magnetic tables) sit at the other end: cheap and fast to set up, but they can't handle irregular geometry or hold tight positional tolerances across features.
Modular fixturing splits the difference. Benefits worth knowing:
- Shorter lead time between design finalization and first cut, since components already exist in inventory.
- Reconfigurability across dozens of part numbers using the same base plate and hardware set.
- Lower inventory carrying cost than stocking dedicated fixtures for every job.
- Strong fit for CMM and vision inspection, where repeatable locating matters as much as it does on the mill.
What Components Make Up a Modular Fixturing System?
A modular build stacks from the base up. You start with a tooling plate or subplate, add locating pins and bushings set to the grid pattern, drop in modular blocks to raise or angle features, then close the loop with clamps (strap, toe, or hydraulic depending on force requirements) and supports or rest pads under thin or unsupported sections. For multi-part production, a tombstone or fixture foundation lets several fixtures mount around one central column.
Assembly logic runs in one direction: baseplate first, then locators set the part's position, then supports catch load-bearing areas, then clamps go on last to hold everything against those locators. The grid pattern and bushing spacing control repeatability from one teardown to the next rebuild, which is the entire point of buying modular over building custom.
- Tooling plates (grid or multipurpose hole pattern)
- Locating pins and bushings
- Modular blocks and risers
- Strap, toe, or hydraulic clamps
- Supports and rest pads
- Tombstones for multi-fixture setups
Pro Tip: Place locators where they resist the actual cutting direction, not just where they're convenient to reach. Save clamps for holding the part against those locators, not for absorbing machining force. If you're speccing power workholding, confirm the plate's bushing pattern matches your actuator's mounting footprint before ordering, since not every grid system accepts the same hydraulic clamp bodies. A simple exploded diagram, plate, block, locator, clamp, stacked in build order, makes this easier to communicate to a machinist than any written spec.
Where Does Modular Fixturing Work Best?
Modular fixturing shows up most often in prototyping, short and medium production runs, replacement-part jobs, and inspection setups where the part being measured changes from week to week. It also covers welding and assembly fixtures where positional accuracy matters more than raw clamping force.
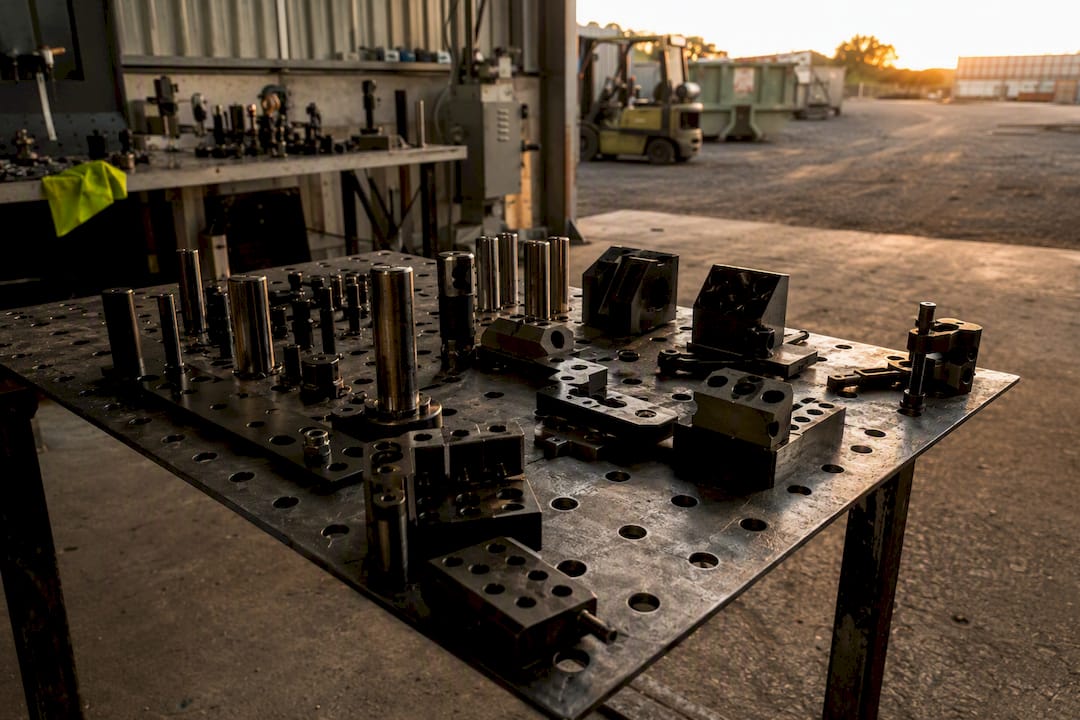
On the machine side, modular systems work across vertical and horizontal mills, multi-axis setups, and tombstone-based configurations for lights-out or multi-part runs. On the inspection side, the same grid bushings and dowel pins that locate a part on the mill locate it on a CMM or vision system, which is what makes modular fixturing genuinely useful for quality control instead of just machining.
Most manufacturers offer systems in size families, mini, standard, and heavy, matched to part mass and expected cutting forces. Key applications to map against your own workflow:
- Prototyping and design validation runs
- Short and medium production batches
- Replacement and spare-part fabrication
- CMM and vision inspection fixturing
- Welding and assembly jigs
How Do You Design a Modular Fixture Correctly?
Follow 3‑2‑1 locating on every build. Six points of contact constrain all six degrees of freedom; anything beyond that is redundant locating, and redundant locating is the most common failure mode in fixture design, producing internal stress and dimensional drift the moment the part is unclamped.
Locators and supports should carry the cutting force. Clamps exist to seat the part against those locators, not to fight the spindle. Directing cutting force into supports rather than clamps is the single biggest lever for reducing part deformation, and it's the detail most junior fixture designs get backward.
Common failure modes worth checking for before the first cut:
- Over-constraint from extra locators fighting each other on nominally flat or round features
- Thin walls left unsupported between locating points, which flex under clamp load
- Clamps oriented to push the part away from its locators instead of into them
Watch stiffness limits closely. Modular fixtures handle low to medium cutting forces well, but very heavy stock removal or extremely high production volumes push you toward a permanent fixture built specifically for that load case. Material choice on the workpiece side matters here too. Softer alloys tolerate less clamp force before marking, which is worth checking against your aluminum temper before finalizing clamp torque.
Pro Tip: If a fixture gets torn down and rebuilt often, dowel the locators instead of just bolting them. Stacked tolerances from repeated reassembly add up fast, and a doweled locator returns to the same spot every time without relying on bolt friction to hold position.
What Does Modular Fixturing Cost Compared to Permanent Tooling?
Four cost variables drive the decision: initial tooling cost (C_ini), setup cost per run (C_setup), running cost per part (C_run, covering load, unload, and any actuator cycling), and maintenance over the fixture's life.
The math generally favors modular fixturing at low batch counts (N_batch) because C_ini stays low, you're reusing owned components. Permanent fixtures carry a heavier C_ini but a lower C_run once you're cutting parts by the thousands, since everything is purpose-built and nothing needs reconfiguring between cycles. A break-even comparison using roughly 200 units as a single-run example shows modular tooling as the more economical route at that volume, with permanent fixturing overtaking it as batch size climbs into the thousands.
| Fixture type | Initial cost (C_ini) | Best-fit batch size |
|---|---|---|
| Modular | Low (reused components) | Around 200 units or single runs |
| Permanent | High (purpose-built) | Thousands of units |
How Do You Choose the Right Modular Fixturing System?
Start with your part, not the catalog. Know your expected run length, peak cutting forces, part weight, and the locating accuracy your drawing calls out before you talk to a supplier.
Checklist to work through before ordering:
- Expected run length and whether volume is likely to grow
- Maximum cutting forces the fixture needs to survive
- Part size, weight, and center of gravity
- Required locating accuracy and repeatability
- Grid spacing and bushing style already in your inventory
- Power-clamping compatibility if you're automating load/unload
- Spare-parts availability and assembly documentation
When you're on the phone with a vendor, ask these in order:
- What system sizes (mini, standard, heavy) do you stock, and which matches my part mass?
- What grid spacing and bushing specification does the plate use?
- Which clamps and supports do you recommend for this cutting force range?
- What's the lead time on custom components if a standard part doesn't fit?
- Do you publish application notes covering CMM or vision compatibility?
Match system size to part mass and cutting force before anything else. A heavy-duty part on a mini-grid system will loosen tolerances faster than any other mistake on this list.
What Have We Learned Running Modular Fixtures in Production?
Prototype work rewards modular fixturing more than almost anything else Flying Chip Factory builds. A design revision that used to mean a new fixture now means swapping a locator and re-torquing two clamps, and because our machinists are the ones doing the swap, a change that would take another shop a day of back-and-forth email gets resolved on the shop floor in an afternoon.
Pro Tip: Keep a labeled, well-organized modular components bin sorted by grid size and bushing type. Changeover time drops significantly when nobody's hunting for the right locating pin across three toolboxes. Inspection setups benefit the same way. Locating a part on a CMM with the same bushing pattern used on the mill removes one more variable from your first-article report.
Where to Learn More About Modular Fixturing Systems
For deeper specs, start with manufacturer application notes: Carr Lane's modular fixturing introduction and product reference cover grid and bushing standards, while the UTEC fixture design guide and Quality Magazine's overview explain locating principles and real shop configurations.
What Manufacturing Engineers Get Wrong About Modular Fixturing
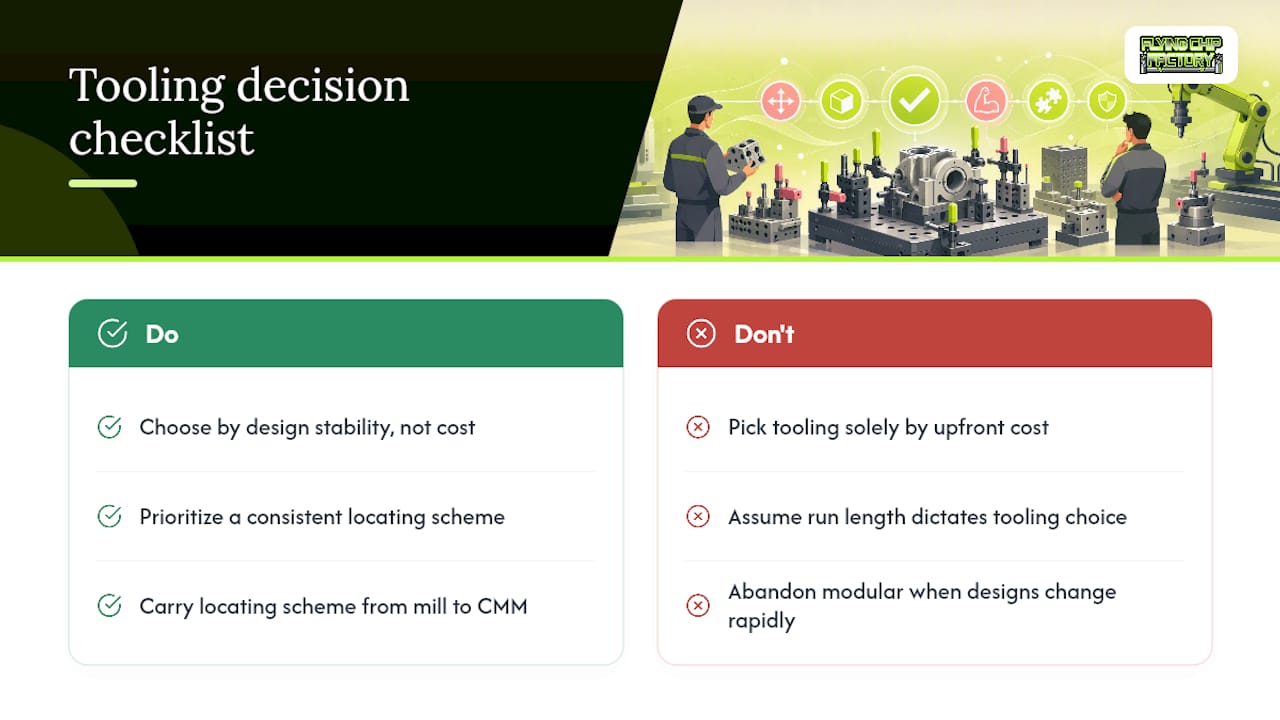
Most guidance on this topic treats modular fixturing as strictly a budget fallback, something you settle for until volume justifies "real" tooling. That framing misses the actual decision variable, which isn't cost at all. It's how often your part geometry changes.
A shop running the same bracket for two years at high volume should build permanent tooling regardless of what it costs upfront. A shop iterating through prototype revisions weekly should stay modular even if a permanent fixture would technically pay for itself, because the fixture will be obsolete before it breaks even. Run length matters less than how stable the design is.
The other thing conventional advice underplays: modular fixturing's real value shows up in metrology, not just machining. An engineer who builds one locating scheme and carries it from the mill to the CMM eliminates a whole category of measurement uncertainty that has nothing to do with the machine tool. Prioritize that consistency before you prioritize cost per unit. Get the locating scheme right first, and the economics tend to sort themselves out.
Get Fixture-Ready Prototypes Without the Fixture-Building Delay
Flying Chip Factory builds the fixtures and the parts in the same shop, so there's no waiting on a separate vendor while your prototype schedule slips. That direct machinist access means a locator swap or clamp change happens the same day someone spots the issue, not after a round of emails.

Flying Chip Factory supports engineers through:
- Fixture-friendly machining that accounts for locating and clamping from the first design review
- Direct collaboration with the machinist running your job, not a project manager relaying messages
- Fast iteration on prototype revisions and inspection-ready parts for CMM or vision setups
If your part needs a modular fixture, a short-run production quote, or a replacement component fabricated fast, request a quote through Flying Chip Factory and upload your drawings to get started. For upstream cutting or blank preparation, Manaraco's comparison of laser and plasma cutting is worth a read before your parts hit the fixture.
Sources
- Fixture design for CNC machining (3‑2‑1 locating explanation)
- Complete Guide to Stationary Workholding and Machining Fixtures (book chapter)
- Design for workholding: avoiding part deformation (Carr Lane design guidance summary)
- Introduction to modular fixturing (Carr Lane engineering resource)
- Modular fixturing: How it works (Quality Magazine)