
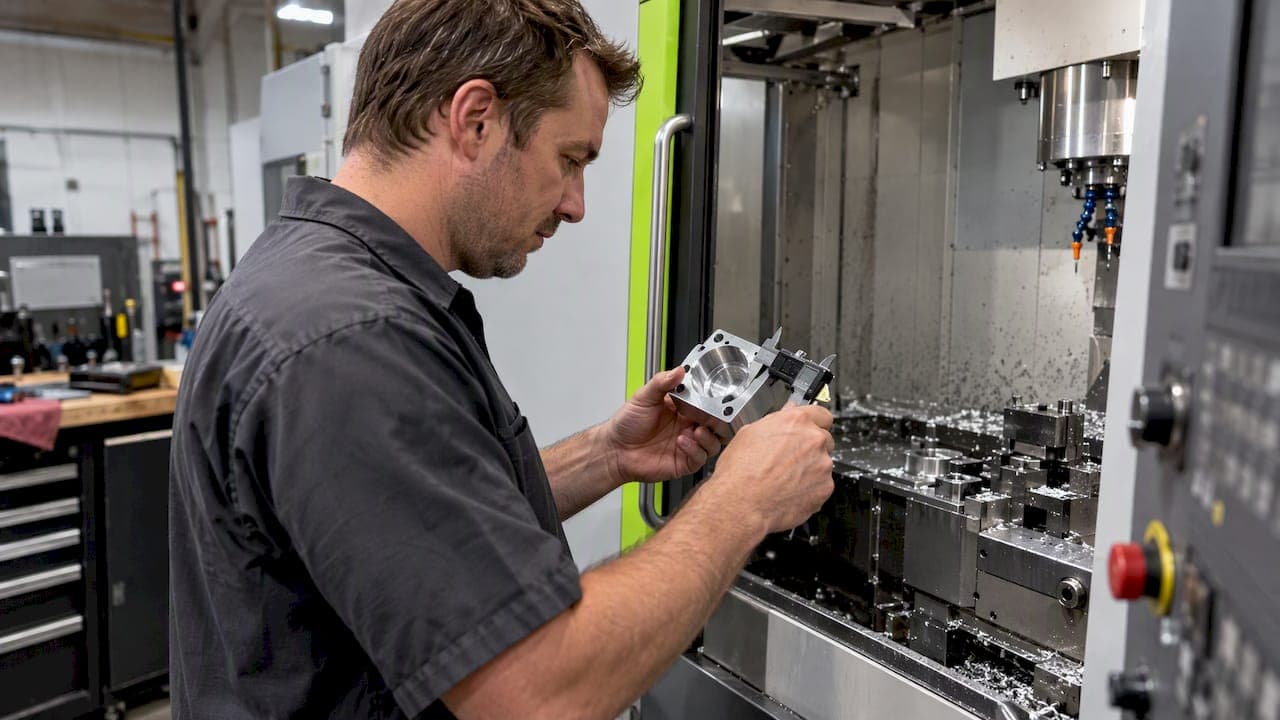
In-process inspection means checking parts, dimensions, or process parameters while production is still running, not after a lot is finished. It lets you catch defects before they multiply, decide disposition on the spot, and keep machines producing conforming parts instead of scrap. Principles from FDA process validation guidance and the broader SPC discipline both treat this kind of live monitoring as the backbone of a controlled process.
TL;DR:
- For low risk dimensions on short runs, measure the first, middle, and last parts; use capability history to set larger samples when available.
- Hold the lot if any sampled critical feature fails, and use full inspection for safety critical characteristics, costly rework, or control chart drift.
- Choose inspection mode by production needs: check prototypes beside the machine, probe critical features on short runs, and use continuous sensors for high volume work.
- Check calibration before use, verify probes against a reference artifact each shift, and reserve CMMs for complex tolerances and hand gauges for single dimensions.
- Tie measurements to the specific lot and operation, retain actual values rather than pass or fail flags, and record any manual override for audit traceability.
What in-process inspection covers on the shop floor
In-process inspection sits between first-article approval and final inspection, and it comes in three common flavors: inline, at-line, and on-line, as described in EMA process validation guidance. Inline inspection happens on the machine itself, often with a probe cycle between operations. At-line inspection happens near the machine, where an operator pulls a part and checks it with a hand gauge. On-line inspection uses sensors built into the process that measure continuously without stopping the cycle.
On a CNC job, inline inspection might mean a probe checking bore diameter right after boring, while at-line inspection might mean an operator spot-checking a bracket's hole pattern with a pin gauge every few parts. Both feed the same goal: confirming critical characteristics before the part moves downstream.
This discipline supports the broader quality planning that APQP and control-plan guidance describes, and it echoes the lifecycle view in FDA process validation guidance, where validation is not a one-time event but an ongoing verification activity. Practical outcomes include:
- Defects get caught at the operation where they occur, not three operations later.
- Corrective action can start during production instead of after a batch ships.
- Measurement data collected during production becomes the raw material for SPC charts and capability studies.
Step-by-step in-process inspection procedure
A repeatable procedure keeps inspection consistent across operators and shifts. Use this sequence at any inspection point in the process.
- Prepare: Pull the control plan for the operation, confirm the gauge or probe is within its calibration cycle, and verify the inspection plan matches the current drawing revision.
- Define sampling: Set sample size and acceptance criteria before the first part runs, not after parts start coming off the machine.
- Execute checks: Measure the sampled parts, record values against the work order or lot number, and make an immediate disposition call of accept, rework, or hold.
- Respond to nonconformance: Contain any suspect parts, flag the operation for corrective action, and notify the responsible engineer or supervisor right away.
- Close the loop: Summarize results at the batch level and retain records for PPAP or validation files.
Pro Tip: Build the disposition decision into the same form or screen where the measurement is recorded, so operators never have to remember a separate step.
This sequence works whether you are running a prototype part or a short production batch. The key is that steps 1 and 2 happen before the spindle starts cutting production parts, not as an afterthought once parts are already stacking up. A shop running mixed small-batch work benefits from having this checklist posted at the machine rather than buried in a quality manual nobody opens mid-shift.
Choosing sample sizes: fixed count versus statistical plans
Sample size decisions should match the risk of the characteristic and the volume of the run, not a blanket rule applied to every job. A Fixed Count 3 plan, where you measure the first, middle, and last part of a run, works well for low-risk dimensions on short runs where full statistical sampling would cost more time than it saves.
For critical characteristics such as a mounting bore that affects fit with a mating part, an attribute sampling plan with a zero-defect acceptance criterion may be more defensible: any defect found in the sample means the lot is held. FDA process validation guidance notes that sampling plans should be designed to yield statistical confidence consistent with the final product specification, which means the sample size should scale with how much a failure would cost downstream.
- Use prior process capability data to set sample size when it exists.
- Default to conservative, higher sample counts for new prototype parts with no capability history.
- Escalate to full inspection whenever a characteristic is safety-related, costly to rework, or showing drift on a control chart.
One sourced principle worth internalizing: continuous process verification, as described in EMA process validation guidance, explicitly ties sample size, monitoring parameters, and acceptance criteria together in a single verification scheme rather than treating them as separate decisions.
Measurement systems, calibration, and tool selection
A measurement system is only as trustworthy as its calibration history and its fit to the characteristic being checked. Measurement systems analysis exists to answer a simple question: is the variation you are seeing coming from the part, or from the gauge and the person using it?
- Keep calibration intervals documented and tied to a traceable standard, and flag any gauge that is overdue before it gets used on a production part.
- Set up on-machine probes with a documented reference artifact check at the start of each shift, since probe drift is one of the most common silent failure modes.
- Choose a CMM for complex geometric tolerances that need multiple datums, hand gauges for quick single-dimension checks on short runs, and inline sensors when a characteristic needs continuous monitoring rather than periodic sampling.
Our calibration setup guide for on-machine probing covers on-machine probing. A partner resource on calibration and validation practices covers the broader distinction between verifying an instrument and validating a process, which is worth understanding before you decide how often to recalibrate.
Inline, at-line, and on-line inspection: picking the right mode
These inspection modes are not interchangeable, and picking the wrong one wastes either time or risk coverage. Inline inspection, using an on-machine probe between cuts, fits high-value or tight-tolerance operations where stopping to disposition a bad part immediately can prevent further parts from being affected by the same error. At-line inspection fits lower-risk characteristics where a quick gauge check near the machine is fast enough. On-line inspection, using continuous sensors, fits processes where drift happens gradually and a single sample would miss it.
- Prototype runs typically lean on at-line checks since volumes are low and flexibility matters more than automation.
- Short production runs often justify inline probing on the one or two characteristics that matter most to fit or function.
- Higher-volume production is where on-line sensors start paying for themselves.
A typical inline workflow looks like this: the probe cycle creates an inspection event tied to the current operation, the probe samples the feature, the system compares the result to tolerance and auto-dispositions the part, and the result logs against the work order in the shop's MES.
Connecting inspection to MES and ERP work orders
Inspection data only becomes useful when it is tied to the work order it came from, not sitting in a separate spreadsheet. Oracle's inline work-in-process inspection documentation lays out a practical flow: create an inspection plan, create an inspection event at a specific operation, capture or update sample results, then associate the manufacturing transaction with the inspection record.
- Set up the inspection plan once per operation, then reuse it across every work order that passes through that step.
- Record sample results against the specific lot and operation, not just the part number, so traceability holds up under a PPAP audit.
- Flag any manual override of an auto-disposition clearly in the record, since an unexplained override is the first thing an auditor will ask about.
This kind of integration matters even for a small shop running SAP QM or a similar quality module. The inspection plan and inspection event structure give you a single source of truth for what was measured, when, and what happened to the part as a result.
Recording and reporting inspection results
An inspection or acceptance report needs enough detail that someone who was not on the floor can reconstruct what happened. At minimum, record the operation number, inspector name, date and time, sample size, actual measurements, and the disposition decision.
- Summarize results at the batch level for PPAP submissions, showing the sample data alongside the specification and the pass or hold outcome.
- Keep raw measurement values, not just pass or fail flags, since raw data supports later capability studies and SPC trending.
- Include a short control-plan row for each inspected characteristic: characteristic name, specification, measurement method, frequency, and reaction plan if the result falls outside tolerance.
Our guide to building Level 3 PPAP for CNC machining shops covers how these inspection records roll up into a complete submission package.
A control-plan checklist you can paste into your SOP
Keep this list posted at the inspection point so operators and inspectors have a consistent reference.
- Characteristic name and drawing callout, including revision level.
- Measurement method and tool, with the calibration ID recorded.
- Sample size and inspection frequency for this operation.
- Acceptance criteria and the disposition steps for accept, rework, or hold.
- Escalation trigger, the name of the corrective action owner, and the record retention period.
This structure mirrors the guidance in ISO's SPC implementation standard, which lists the tools and techniques needed to plan, implement, and evaluate an effective SPC system at the operation level.
Shop-floor experience behind this guidance
This guidance reflects hands-on CNC machining work on prototype and short-run jobs, where inspection has to be fast enough to keep up with a single-part setup and rigorous enough to catch a bad fixture offset before it ruins more parts. We design and machine motorcycle parts in-house, including a bolt-on kickstand for electric mini dirt bikes, alongside contract prototype and short-run jobs for outside engineers and small manufacturers. Related procedures worth reading alongside this one include our SPC guide for prototype machining and our first article inspection guide.
Why small shops should start simple and build up

The biggest mistake a small shop makes is trying to build a full SPC system before it has even protected the one dimension that actually matters to the customer. Start by identifying the characteristic that affects fit or function on the next operation, inspect that first, and get the result back to the machinist in minutes, not at end of shift. A fixed-count plan on day one beats a statistically elegant plan that takes three months to set up.
Rapid feedback loops matter more than sophistication early on. Once a few jobs have run clean, layering in control charts and trend data becomes a natural next step rather than a burden.
— Drake
How we build inspection into every prototype and short-run job
We run prototype machining, short-run production, and fixture or bracket fabrication, with no sales layer between you and the machinist cutting your parts. That means inspection checkpoints, sample sizes, and disposition decisions are worked out directly with the person running the job.

If you have a prototype or short run that needs inspection built into the process from the first part, reach out through our prototype and short-run machining services page to discuss checkpoints for your next job. If you ride an electric mini dirt bike, our E2 Kickstand is made in-house.
FAQ
What are the steps involved in the inspection process?
The core steps are preparation (reviewing the control plan and verifying calibration), defining sampling and acceptance criteria, executing measurements and recording them against the lot, disposition of the part, and closing the loop with a batch summary. This sequence applies whether you are checking a single prototype part or a full production lot.
How do I perform an in-process inspection in SAP QM?
In an SAP-style quality module, you typically trigger an inspection lot from the production order, record results against the inspection characteristics defined in the inspection plan, and the system proposes a usage decision based on those results. The structure mirrors the inspection plan and inspection event flow described in Oracle's inline inspection documentation, even though the screens differ between ERP vendors.
What is an acceptance and inspection report?
An acceptance or inspection report is the record that documents what was measured, by whom, against what specification, and what disposition resulted. At minimum it includes the operation, inspector, date and time, sample size, actual measurements, and the accept, rework, or hold decision.
What is inProcess?
"InProcess," when used generically in manufacturing software or documentation, usually refers to in-process inspection functionality built into an MES or ERP system, meaning the tools used to create inspection plans, capture sample results, and trigger dispositions during production rather than after it. The exact feature set varies by vendor, so check the specific platform's documentation for its definition.
Sources
- Process Validation: General Principles and Practices
- Guideline on process validation for finished products - information and data to be provided in regulatory submissions
- Perform Inline Work In Process Inspection
- Advanced Product Quality Planning and Control Plan