
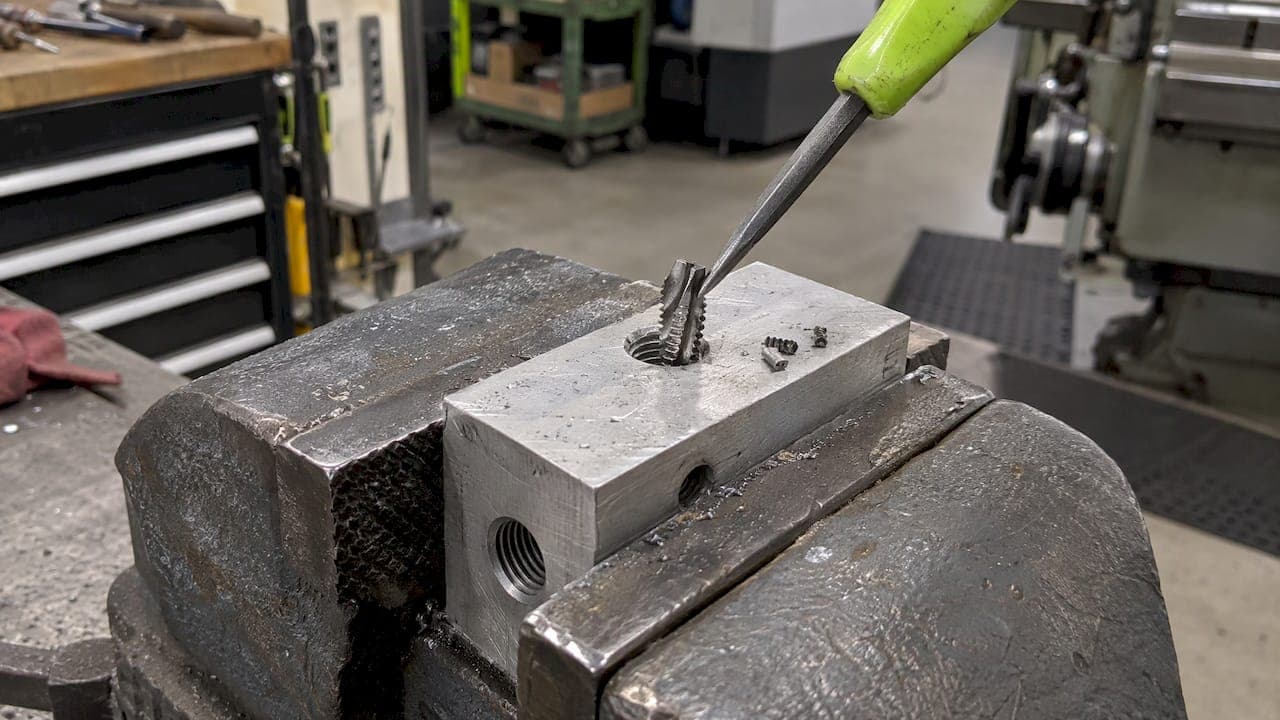
The safest way to remove a broken tap is to look before you reach for a tool. Check whether the tap is in one piece or shattered, how far it sticks out, and whether the hole is blind or through. Then work up the ladder: pick out loose fragments, try a tap extractor on a loose tap, drill it out with solid carbide in a rigid setup, and hand the part to an EDM service when the part is too valuable to risk. Each step below says when to use it and when to stop.
TL;DR
- Spend two minutes on assessment first: break condition, protrusion, hole type, workpiece material and whether the thread must survive.
- A tap extractor is the first mechanical attempt for a loose, straight-flute tap. Never force it, because the fingers can snap and make things worse.
- Solid carbide drilling works in a rigid machine with the part clamped down, a very slow feed and frequent chip clearing.
- EDM removes the tap without mechanical contact, so it suits valuable parts and hardened material. It is the most reliable method but not every shop has it.
- "Tap removed" and "part saved" are different results. Inspect the thread afterward.
Assess the break before you touch it
Most wrecked parts are wrecked by the second attempt, not the first break. A rushed extractor or a drill that wanders turns a bad afternoon into scrap. One industry guide puts it plainly: two minutes spent evaluating the break can prevent hours of wasted time or a scrapped part.
Clear the chips first so you can see what you have. Then answer these questions:
- Is the tap in one piece or shattered? A U.S. Army technical manual on hand and power tools advises identifying whether the tap broke as a single piece or shattered. If it shattered, pick the fragments out with a small prick punch or a magnetized scriber before anything else.
- How much is exposed? A protruding stub can be gripped. A flush or recessed break needs more precise access, and the break depth and orientation determine the approach.
- Blind or through? In a through hole you may be able to push or knock fragments out the far side. In a blind hole, chips and fragments have nowhere to go.
- What is the workpiece? Aluminum, mild steel and hardened tool steel call for different methods.
- What is the tap? Note its size, pitch, flute style and material. A high-speed steel tap behaves differently from a carbide or cobalt one.
- Does the original thread matter? A scrap-bin fixture plate and a one-off prototype housing do not deserve the same risk.
Write these down. They decide how much force and tool clearance is safe, and they tell you whether to keep going or stop.
If you run a shop where taps break more than they should, process discipline helps as much as technique. Structured checks before maintenance interventions are one way to cut down on avoidable stoppages and damage, and the same habit of checking before you act applies at the bench.
The removal ladder, from gentlest to most involved
Think of the methods as a ladder. Start low and climb only when the lower rung fails or does not fit your situation.
| Method | Best for | Main risk |
|---|---|---|
| Picking out fragments | Shattered tap, loose pieces | Pushing pieces deeper |
| Tap extractor | Loose straight-flute tap with exposed or accessible flutes | Snapped extractor fingers |
| Solid carbide drilling | Tap in a rigid, clamped part, machine available | Drill walking into the parent thread |
| EDM | Hardened parts, carbide or cobalt taps, valuable workpieces | Cost and finding a provider |
| Welding a nut to the stub | Protruding stub in a part that tolerates heat | Heat distortion, damage to the hole |
One editorial note on the last row: a reference page on extractors lists welding as an option when an extractor does not work, but heat is a poor fit for thin-walled or precision parts. Treat it as a repair for rugged, low-value pieces.
Step 1: Pick out what you can
If the tap shattered, you are not extracting a tap, you are removing debris. Use a prick punch or a magnetized scriber to lift fragments out, as the Army manual describes. Work gently. Tapping the pieces with a punch can crack them smaller, which is fine for a through hole where they can fall out, and a problem in a blind hole where they may pack tighter.

Flush the hole with air or a suitable fluid and look again. Often one or two stubborn pieces remain, and those are what the next steps deal with.
Step 2: Use a tap extractor correctly
A tap extractor has thin fingers that slide into the flutes of the broken tap, with a collar and sleeve that support them. You turn the whole assembly with a tap wrench. It is the cheapest and fastest attempt, and it works best when the tap is loose rather than jammed. The guidance is that straight-flute hand taps are the normal match for extractors, so check your flute style before you start.
The maker's own instructions give a clear sequence. Clear the chips, insert the fingers gently without forcing them, slide the collar and sleeve down, then twist forward and back with a tap wrench. The fingers must be supported along their entire length, either by the holder or by the tap flutes. An unsupported finger bends or snaps.
Practical tips from the bench:
- Work the tap both ways. Small forward and back motions break the tap free better than a steady pull in one direction.
- Add a little penetrating or cutting fluid if the tap is seized by packed chips. Let it work in before you try again.
- Stop at the first sign of binding. If a tap is tight, an extractor may break and make the situation worse. A broken extractor finger inside a broken tap is a much harder problem than the original.
- Keep the extractor square to the hole. Side load is what bends fingers.
If the tap does not move with moderate, even pressure, climb the ladder rather than leaning harder on the wrench.
Step 3: Drill it out with solid carbide
When the tap is jammed or the flutes are too damaged for fingers to seat, carbide drilling is the next option. It is the method machinists reach for when the part is already in a vise or fixture on a mill.
The prerequisites are not optional. A carbide tap-removal tool manufacturer's guidance calls for a rigid machine with the part held securely, a very slow feed to prevent walking or deflection, and pecking or stopping to clear chips. Solid carbide is hard and brittle, so a loose setup or a hand-held drill motor invites a snapped bit, and a broken carbide bit in a hole is nearly impossible to remove with ordinary tools.
A workable sequence:
- Indicate or locate the hole center. Do not trust the original program position. Sweep the hole with an indicator or edge finder.
- Flatten or spot the broken tap face. A tap that broke at an angle will push a drill sideways. The same manufacturer recommends flattening or spotting it first.
- Choose a drill smaller than the tap's core. You want to remove the center of the tap and leave the flute shell to collapse or be picked out, not cut into the parent thread.
- Feed slowly and peck. Retract often to clear chips, particularly in a blind hole where chips pack at the bottom.
- Pick out the remains with a pick or punch once the tap is hollowed.
- Clean and inspect the hole before deciding whether it can be re-tapped.
Blind holes need extra thought. Drill depth is normally greater than full thread depth to allow for the drill point, chip accumulation and safe clearance. That extra room is the same space that tends to be packed with chips after a break, so use it for clearing, not for pushing deeper.
Carbide drilling can still drift. If the setup is not rigid, or the tap sits near the edge of a thin wall, the risk to the part climbs fast. That is the point to consider the next method.
Step 4: Consider EDM tap removal
EDM (electrical discharge machining) erodes metal with controlled sparks instead of cutting it. For tap removal, that means the tap is eroded away with no mechanical force on the surrounding threads. One experienced machinists' publication calls it probably the most reliable removal method, though less practical because most small shops lack access to EDM machines.
You can see why it suits certain jobs:
- Hardened workpieces, where a carbide drill struggles or chips.
- Carbide or cobalt taps, which are hard enough to defeat ordinary drills.
- Blind holes where chips cannot escape.
- High-value or precision parts, where the original thread and hole geometry must survive. One EDM provider's view is that when preservation is the priority, a non-contact process is favored because ordinary drilling can drift into the parent thread.
The practical catch is access. Most shops do not own the equipment, so EDM usually means sending the part to a specialty service and waiting. For a part worth hundreds of dollars in machining time, that is often the cheapest path. For a bracket you can remake in twenty minutes, it is not.
When to stop and change the plan
Knowing when to quit is part of the skill. Stop when:
- The extractor does not release the tap with moderate pressure. Forcing it can break its fingers.
- The drill wanders toward the thread wall.
- The part has thin walls, critical threads or high value. A professional salvage assessment is justified before attempting any cutting or removal in those cases.
- You have already broken one removal tool in the hole.
If the part is a prototype or short-run piece, do the math on remaking it. A fresh part from stock, machined with known-good tooling, often costs less than a day of salvage attempts and gives you a clean hole.
After the tap is out: is the hole still good?
Getting the tap out is not the finish line. As one guide stresses, "tap removed" and "part accepted" are two distinct outcomes, and a hole can be left with debris or damaged thread flanks even after a clean extraction.
Inspect before you assume. A calibrated Go/No-Go plug gauge checks thread form, and damage below the minor diameter may mean the hole cannot simply be recovered by re-tapping. Our page on machined part inspection covers methods and timing.
If the thread is damaged, you have repair options:
- Drill and tap for the next larger fastener, when the design allows a bigger bolt.
- Install a Heli-Coil style thread insert to restore the original size. One hobbyist reference describes an insert as a stronger, more durable repair, and both options appear there for stripped threads.
For soft metals the repair question matters even more, since aluminum threads wear and strip more easily. See our notes on aluminum thread design, geometry, engagement and inserts before choosing.
Safety while removing a broken tap
Wear eye protection whenever you use extractors or cutting tools. Broken tap fragments, snapped extractor fingers and carbide slivers all fly. The maker of one common extractor line also warns that its product contains lead, so wash your hands after handling it and keep it away from food and children.
Clamp the part. Do not hold it in your hand while you turn a wrench against it.
Stop breaking taps in the first place
The best removal method is not needing one. Many breakages can be prevented with the correct tap drill size, proper cutting fluid and by avoiding excessive force when resistance is encountered. Beyond that, a few shop habits pay off:
- Fix chip evacuation first. Packed flutes are the classic cause of a snapped tap. Our chip evacuation checklist starts at coolant and works outward.
- Respect the blind hole. Drill depth, chip room and tap choice interact. See blind hole tapping.
- Do not over-engage threads. Extra depth adds torque and risk with little strength gain. We explain the 1.3×D engagement length rule.
- Match the technique to the metal. Soft alloys have their own drill sizes, taps and lubricants, covered in tapping aluminum.
- Consider thread milling on expensive or hard-to-replace parts. A milled thread cannot leave a tap stuck in the hole. Our comparison of thread milling vs tapping gives three rules for deciding.
What we think about broken taps
We machine motorcycle parts and customer jobs in one shop in Athens, Alabama, and we have dealt with the moment a tap lets go. Our view is simple: the removal is only half the job. The other half is deciding, before you start, what the part is worth and how much risk the hole can take.
Because we design and machine our own parts, we think about threads from both sides. A kickstand bolt hole or a fixture tapped hole has to hold up to vibration and repeated use, so we care about clean thread form, sensible engagement and enough material around the hole. When a tap breaks in a part like that, we slow down, assess, and choose the least aggressive method that will work.
We also believe in talking to the person who actually holds the tool. When you bring us a job, you speak directly with the machinist who will program, set up and cut it. That means questions like "should this be tapped or thread milled?" get answered before the first chip, which is the cheapest time to prevent a broken tap.
Drake
Need a part made instead of salvaged?
Sometimes the right answer to a stuck tap in a damaged part is a fresh part. We offer prototype machining, short-run production, and fixtures, brackets and support parts, all designed and cut in a single shop with direct access to the machinist. Send us the drawing or the damaged piece and we can talk through whether to repair or remake it.
The same shop also builds the E2 Kickstand for the KTM SX-E 2, GASGAS MC-E 2 and Husqvarna EE 2, a CNC-machined bolt-on replacement for the factory triangle stand, priced at $100 to $105. For custom work, start at our CNC machining services page.

FAQ
Can I remove a broken tap with a regular drill bit?
Usually not. Taps are harder than standard drill bits, so the bit dulls, skates off or snaps. Solid carbide tooling in a rigid machine with a slow feed is the usual drilling approach, and even then the bit can wander into the thread. If the tap is hardened or the part is valuable, consider EDM instead.
What is the best tap extractor for a broken tap?
The right extractor is the one that matches your tap's flute style and size, and fingers that are supported along their full length by the collar or the flutes. Straight-flute hand taps are the normal match. Whatever you buy, use it gently and stop if the tap is jammed.
Is EDM tap removal worth the cost?
It is when the part is expensive, hardened or precision-made, because the process puts no mechanical load on the surrounding thread. For a cheap part you can remake quickly, machining a new one is often more economical. Ask the EDM provider for a quote and compare it with the cost of remaking.
Can I re-tap the hole after removing a broken tap?
Sometimes. Check the thread with a Go/No-Go gauge first. If the thread is damaged below the minor diameter, re-tapping may not recover it, and you should drill and tap for a larger fastener or install a thread insert.
Sources
- Hand, Measuring, and Power Tools (U.S. Army TM 10-590)
- How to Remove a Broken Tap: 6 Methods, Tools and Prevention
- How To Remove a Broken Thread Tap: A Professional Guide
- Tap Extractor reference page
- How to Remove a Broken Tap: Extractors, Carbide, EDM and more
- How to Use Walton Tap Extractors
- Tech Help: Broken Tap Removal Tools, Solid Carbide
- CNC Threads and Tapped Holes: A Practical Design Guide
- 6 Effective Ways to Remove Broken Taps
- What Is an EDM Tap Remover? How Broken Tap Removal Works
- Broken Tap Removal: EDM, Tools and When to Outsource
- Recover Broken Tap Mid-Pattern
- Removing Frozen or Broken Fasteners and Taps
- Pre-intervention checks in industrial maintenance