

For blind hole tapping, use a spiral-flute or steep-helix tap that pulls chips up and out, then drill deeper than the print's thread callout. The reliable formula: drill depth = required effective thread depth plus tap chamfer length (typically a few pitches) plus chip clearance (at least one additional pitch). Skip either part and you get a broken tap, a scrapped part, or threads that look fine but strip on the third bolt.
Before you chuck up a tap, run this checklist:
- Tap type: spiral-flute or steep-helix (35° to 50°) for blind holes; never a spiral-point/gun tap, which pushes chips forward into a wall that doesn't exist.
- Pilot drill: use major diameter minus pitch as your starting point, then check a tap-drill chart for the exact size.
- Drill depth: thread depth plus chamfer plus clearance. Never drill to exactly the thread callout.
- Chip clearance: pack in at least one extra pitch beyond chamfer, more on older machines or gummy materials.
- Lubrication: cutting oil or paste, matched to material, applied before the tap ever touches the hole.
- Rigidity: floating or tension/compression holder unless you're running a rigid-tap cycle with a servo spindle.
Key Takeaways
Reliable blind hole tapping comes down to one formula: drill depth must equal thread depth plus tap chamfer plus chip clearance, paired with a chip-evacuating tap geometry.
| Point | Details |
|---|---|
| Use chip-lifting tap geometry | Spiral-flute or steep-helix (35° to 50°) taps pull chips out of blind holes; gun taps push chips into a dead end. |
| Calculate real drill depth | Add thread depth, tap chamfer (2 to 4 pitches), and at least 1 pitch of chip clearance before drilling. |
| Target 75 to 77% engagement | Pilot = major diameter minus pitch gives strong threads without excess tapping torque. |
| Match tap and lubricant to material | Stainless needs coated taps and lower feeds; aluminum tolerates forming taps well. |
| Outsource risky or deep geometry | Flying Chip Factory takes on blind-hole jobs where depth, material risk, or tolerance make in-house tapping costly to get wrong. |
What Makes Blind Hole Tapping Different From Through-Hole Tapping
A through hole gives chips somewhere to go. A blind hole doesn't. That single difference drives almost every decision in this article: which tap you buy, how deep you drill, and how you program the cycle.
Chips generated during tapping have to go somewhere. In a through hole, gravity and the tap's flutes push them out the far side. In a blind hole, the bottom of the hole is a dead end, so chips have exactly one way out: back up along the flutes and out the top. If the tap geometry doesn't actively lift chips, they pack into the hole bottom, jam the flutes, and either snap the tap or smear the thread crest as the tap tries to cut through its own debris.
This is why blind hole tapping guidelines treat chip evacuation as the design constraint, not an afterthought. Everything downstream, drill depth, tap selection, feed rate, exists to solve one problem: get the swarf out of a hole that has no exit.
Material chip type matters here too. Aluminum and brass tend to produce short, brittle chips that clear fairly easily. Mild steel and stainless can throw long, stringy chips that wrap around the tap shank if the helix angle is wrong. That's one reason a general-purpose tap that works fine in a through hole in 6061 aluminum can fail badly in a 1-inch-deep blind hole in 304 stainless.
Which Tap Types Work Best for Blind Holes?
Tap selection for blind holes comes down to one question: does the geometry pull chips up and out, or does it push them forward into a dead end?
Spiral-flute taps cut with a right-hand helix, typically 15° to 30° for general use and steeper for gummy or deep applications, and they lift chips up out of the hole as they cut. BAER Tools recommends Form C taps with short chamfers and right-hand spiral flutes as the standard choice for blind hole work, precisely because the flute geometry carries chips backward instead of packing them at the bottom.
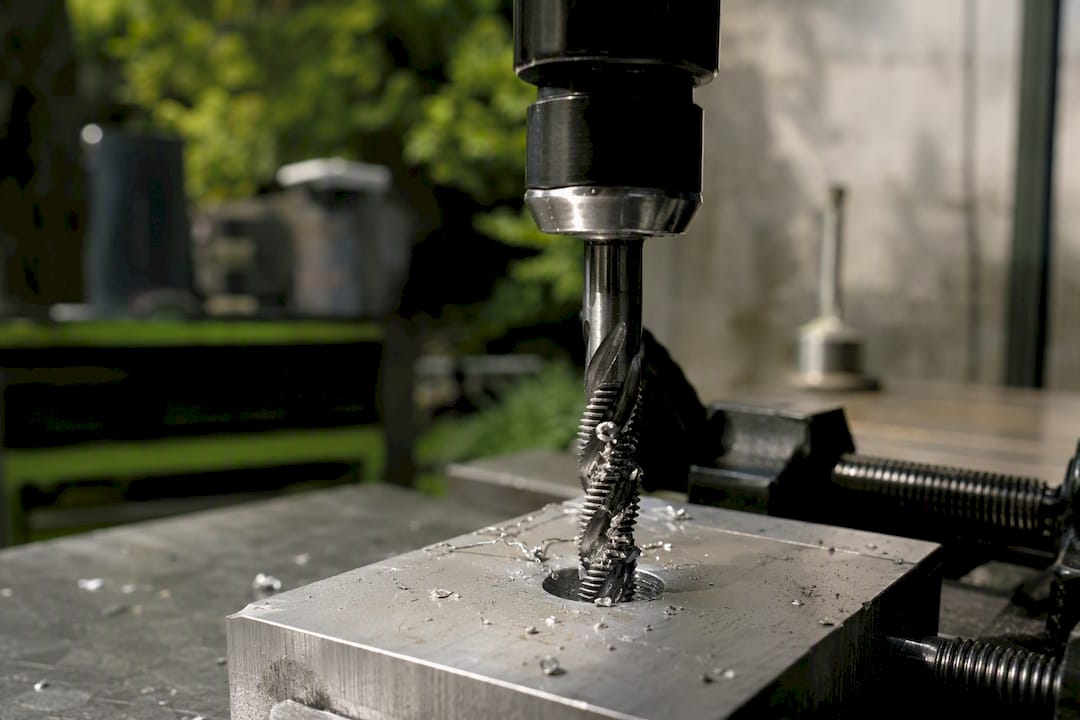
Steep-helix blind-hole taps push that further, using helix angles in the 35° to 50° range. These earn their keep in deep blind holes or long-chip materials, where a standard spiral-flute tap can't clear chips fast enough before they compact.
Bottoming taps have a short chamfer, usually 1 to 1.5 threads, so they can cut full threads almost to the floor of the hole. Use them as a second pass after a taper or plug tap has started the thread, when you need every last usable pitch of depth.
Forming taps don't cut at all; they displace metal to form the thread, which eliminates chips entirely. That makes them ideal for ductile materials like aluminum and low-carbon steel, though they demand a larger pre-drill and more torque than cutting taps.
Spiral-point (gun) taps are the one geometry to avoid in blind holes. Their left-hand flute pushes chips forward, ahead of the tap, which is exactly backward for a hole with no exit. Reach for a gun tap on through holes only.
- Spiral-flute: general-purpose blind-hole workhorse, moderate chip lift.
- Steep-helix: best for deep holes and long-chip steels, higher cost.
- Bottoming: recovers maximum thread depth, needs a pilot tap first.
- Forming: no chips, higher torque, works best in ductile metals.
- Spiral-point/gun: through holes only, will jam in a blind hole.
Pro Tip: Match helix angle to hole depth, not just material. A 20° spiral flute clears chips fine in a 3/8-inch-deep hole but struggles past 1.5 diameters deep. Once you're tapping deeper than about two diameters, step up to a 35°+ helix even in aluminum.
How Do You Calculate Drill Size and Depth for a Blind Tapped Hole?
The pilot drill formula is simple: pilot diameter = major diameter − pitch. That simple calculation prevents most tapping failures before the tap ever touches metal.
For a metric M10×1.5 thread, that's 10 minus 1.5, or an 8.5 mm pilot drill, which matches typical recommended engagement percentages as shown in Whole-Spec's tap drill reference for coarse metric threads, which is the sweet spot most shops target. For an inch-size example like a 1/4-20, the same logic in reverse gives you the standard #7 drill (0.201 inches), which lands in the same engagement range.
Thread engagement matters more than most new machinists expect. A 0.1 mm change in pilot diameter measurably shifts both engagement percentage and torque, so resist the urge to round down "for safety."
Depth is where blind holes get you if you're not careful. The drawing's thread-depth callout is not your drill depth. You need three numbers stacked on top of each other:
- Effective thread depth required by the print or engagement spec.
- Tap chamfer length, typically 2 to 4 pitches depending on the tap style (bottoming taps are shorter, taper/plug taps longer).
- Chip clearance and over-travel allowance, at least one additional pitch, and often more depending on machine and chip behavior.
Worked example, 1/4-20 UNC: say the print calls for 0.375 inches of full thread. Add a typical chamfer allowance and chip clearance, making your minimum drill depth significantly deeper than the thread depth specified on the print, as explained in detail by Cutting Tool Supply (https://cutting-tool-supply.com/manufacturing-tips/determining-the-minimum-tap-drill-depth/), and it's worth running the numbers on paper before you ever touch a CNC program.
Statistic Callout: The pilot = major diameter minus pitch rule consistently produces 75 to 77% thread engagement on standard coarse metric threads, the same range most published tap-drill charts are built around, and pushing past it buys you almost nothing in joint strength for a lot more torque risk.
What's the Right Setup and Procedure for Tapping Blind Holes?
Rigidity and depth control decide whether a blind-hole tapping program runs clean or eats taps for breakfast. Get the setup checklist right first.
- Confirm spindle runout is within tolerance for your tap size; excessive runout tears threads on entry.
- Use a floating or tension/compression tap holder unless running a true rigid-tap cycle with a synchronized spindle.
- Apply cutting oil or paste before the first pass, not after you notice resistance.
- Set spindle speed to the tap manufacturer's recommendation for the material; going faster doesn't clear chips faster in a blind hole, it just heats the tap.
- Verify your programmed Z-depth stop leaves margin for chamfer and clearance, not just the thread callout.
Once the machine is set up correctly, the program itself needs a few specific moves:
- Peck tap in stages rather than a single plunge, especially past 1.5 diameters deep, backing out fully between pecks to clear chips.
- Program a dwell at full depth before reversing, giving the spindle a moment to fully reverse direction before withdrawal starts.
- Set your depth stop to the calculated minimum drill depth, with a small safety margin, never to the bare thread-depth number from the print.
- Reverse at full spindle speed on withdrawal, matching the tap's forward feed rate exactly if you're running rigid tapping.
- Consider thread milling instead of tapping when the geometry is marginal. CNCCookbook notes thread milling produces lower cutting forces and lets you cut closer to the true bottom of the hole, and a broken thread mill is small enough that it rarely scraps the part the way a broken tap does.
Before you run production quantities, check tap condition under magnification and confirm the workholding hasn't shifted since setup. A five-minute inspection here is cheaper than a batch of scrapped housings.
How Does Material Change Your Tap Choice and Feed Rates?
Material dictates tap geometry, drill size, and lubricant more than almost any other variable in blind hole tapping. Get the material call wrong and no amount of careful programming saves the part.
Aluminum tolerates forming taps well, since the metal displaces cleanly without producing chips at all. Where cutting taps are used, a 2 to 3 flute spiral tap with a light cutting oil handles most 6061 and 7075 work without drama. If you're machining a temper-specific part, T6 versus T6511 aluminum behaves differently enough under the tap that it's worth checking before you commit to feed rates.
Mild steel produces longer chips than aluminum, so a spiral-flute tap with a moderate helix, 25° to 35°, clears well with a sulfur-based cutting oil.
Stainless steel is the material most likely to gall and work-harden mid-cut. Drop your feed rate below what you'd run in mild steel, use a coated tap (TiCN handles galling better than uncoated HSS), and don't skimp on lubricant; stainless punishes shortcuts here more than any other common alloy.
Brass cuts easily and produces short chips, so most standard spiral-flute taps handle it without issue. Watch for chip welding on leaded brass grades if you run dry.
Cast iron produces abrasive, gritty chips that wear tap coatings fast. A coated HSSE tap with a moderate helix and light air blast for chip clearing outperforms an uncoated tap by a wide margin in tool life.
Pro Tip: If you're fighting long, stringy chips in steel or stainless, don't just add lubricant, add a peck-and-clear step every half-diameter of depth. Breaking the chip mechanically beats trying to flush it out after it's already wrapped around the tap.
How Do Chamfer Length and Tap Coating Affect Blind-Hole Threads?
Chamfer length is the part of tap geometry most machinists underestimate, and it directly eats into the usable thread depth you calculated earlier.
Standard taps come in chamfer forms labeled A through F, though the ones you'll actually encounter are mostly taper (8 to 10 threads), plug (3 to 5 threads), and bottoming (1 to 1.5 threads). The chamfer is the tapered lead-in at the tip that gradually cuts to full thread depth. A longer chamfer starts easier and lasts longer but leaves more incomplete thread at the bottom of a blind hole. That's the tradeoff: taper taps are forgiving to start but waste depth; bottoming taps recover depth but demand near-perfect alignment since there's no lead-in to correct a crooked start.
The standard blind-hole play: start the hole with a taper or plug tap to establish alignment, then follow with a bottoming tap to cut full threads as close to the floor as the drill depth allows.
Coating and base material matter almost as much as flute geometry:
- HSS (high-speed steel): adequate for aluminum, brass, and low-volume work; wears fastest.
- HSSE (cobalt-enriched HSS): better heat resistance, worth the upgrade for stainless and cast iron.
- TiN coating: reduces friction and galling in general-purpose steel work.
- TiCN coating: harder and more heat-resistant than TiN, the better call for stainless and abrasive alloys.
For deep blind holes specifically, BAER Tools' guidance on Form C taps pairs a short chamfer with a right-hand spiral flute at 35° to 50° helix, giving you both the depth recovery of a short chamfer and the chip-lifting benefit of a steep helix in one tool.
Why Do Taps Break or Threads Come Out Wrong?
Most blind-hole tapping failures trace back to one of four causes, and each has a specific fix rather than a generic "slow down and add oil" answer.
| Symptom | Likely cause | Fix |
|---|---|---|
| Tap breaks mid-hole | Drill depth too shallow, chips packing at bottom | Recalculate depth (thread + chamfer + clearance); switch to steeper helix |
| Threads feel smeared or rough | Wrong lubricant, or chip re-cutting on withdrawal | Match lubricant to material; peck-tap with full withdrawal between passes |
| Tap won't start straight | Runout or misaligned pilot hole | Check spindle runout; use a taper tap first for alignment before bottoming |
| Go gauge won't seat, no-go seats too easily | Pilot drill oversized, low thread engagement | Re-check pilot size against major diameter minus pitch; verify chart values |
| Thread strips under load | Engagement too low, or wrong material tap | Verify engagement percentage; confirm tap material matches base metal |
Inspect finished blind threads with a go/no-go gauge set matched to the thread class; the go gauge should thread in smoothly by hand, and the no-go should not engage more than a turn or two. A go/no-go gauge reference is worth keeping at the machine, not just in a drawer, since inconsistent gauge use is how marginal threads slip through inspection.
If runout exceeds a few thousandths on a small tap, or a batch shows repeated go-gauge failures, stop the run and re-verify the pilot hole and tap condition before continuing. Chasing the problem thread by thread wastes more time than a five-minute setup check.
What Tools Do You Need, and When Should You Outsource Blind-Hole Tapping?
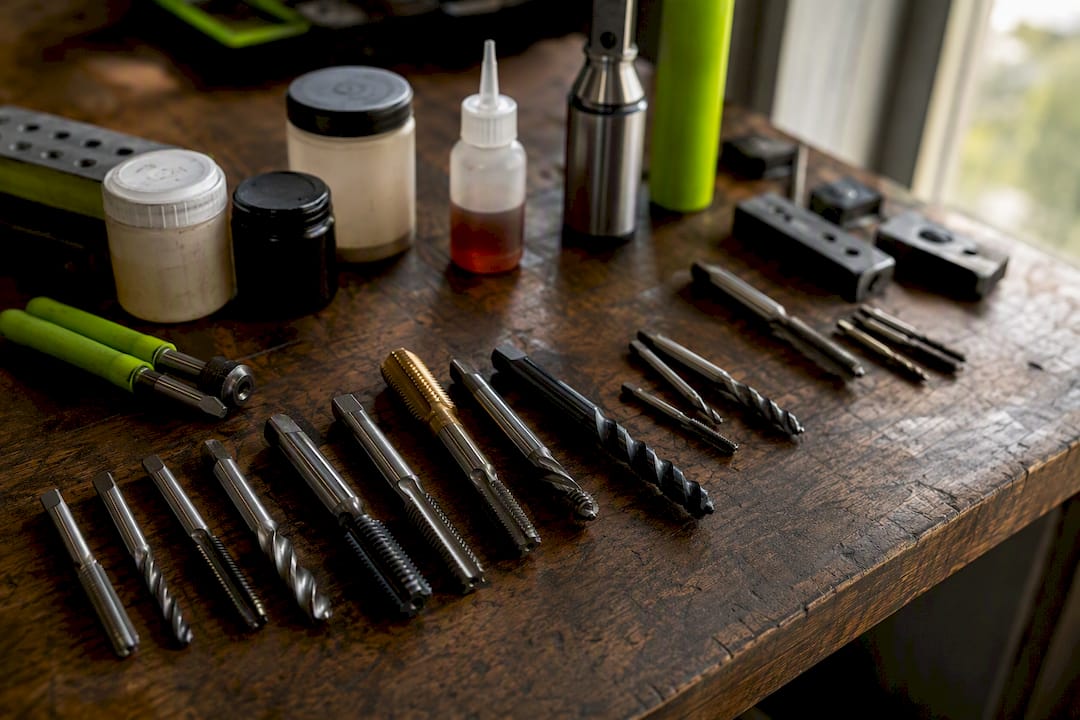
A shop tapping blind holes regularly needs a specific tool kit on hand: spiral-flute and steep-helix blind taps, bottoming taps, forming taps for ductile alloys, floating and rigid tap holders, and a go/no-go gauge set matched to your common thread sizes.
Outsourcing makes sense in a few clear situations: when hole depth exceeds what your tooling reliably clears, when the material carries real breakage risk (hardened stainless, thin-wall parts where a snapped tap means a scrapped casting), when volume doesn't justify buying specialty steep-helix taps for a one-off job, or when the print calls for inspection documentation beyond a hand gauge check.
To get an accurate quote from a job shop, provide the print with full thread specification, base material and condition, required hole depth, surface finish callouts, and quantity. A shop like Flying Chip Factory can flag manufacturability issues, like a chamfer eating too much usable depth, before the job ever hits the machine, which is cheaper than finding out after a batch is scrapped.
What We See Most Often, and What We Do Differently
The most common failure we see isn't a bad tap. It's a print that specifies thread depth and nothing else, leaving the drill depth to guesswork. We've reworked parts where the pilot hole stopped exactly at the thread callout, with zero allowance for chamfer or chip clearance, and the tap bottomed out and snapped on the third hole of a run.
The second most common mistake is tap geometry mismatched to the material. A gun tap ordered for a through-hole job that later got specced as blind, nobody caught it until chips packed solid on the first part.
What changes this on our floor: every blind-hole print gets the drill depth recalculated against chamfer and clearance before it goes to the machine, not assumed from the callout. We also check drill point cone angle against required depth up front, since a standard 118° point eats more usable thread than most people expect on a shallow hole.
When It Makes Sense to Bring Flying Chip Factory Into a Blind-Hole Job
If a blind-hole thread is deep, in a tricky alloy, or one bad tap away from scrapping an expensive casting, that's exactly the kind of job where in-house guesswork gets expensive fast.

Flying Chip Factory runs prototype and short-run CNC work out of Athens, Alabama, with direct access to the machinist actually cutting your part, not a account rep relaying messages back and forth. That matters most on blind-hole threads, where a five-minute conversation about chamfer allowance or material choice can save a whole batch. Our own product line, including CNC-machined kickstands for electric dirt bikes, runs through the same tapping and inspection process we use on customer jobs, so the guidance you get is grounded in parts we actually build and sell, not theory.
To get a quote, send over your print with the thread specification, material and condition, required hole depth, surface finish, quantity, and any inspection requirements like go/no-go gauge documentation. We'll flag manufacturability concerns, chamfer depth eating into your thread engagement, marginal geometry that might call for thread milling instead, before cutting starts. Request a quote through Flying Chip Factory and get a machinist's read on the job, not just a price.
Sources
- Tap Drill (Coarse) Spec Table M2~M24 (15 Sizes) — Whole-Spec
- Determining the Minimum Tap Drill Depth — Cutting Tool Supply
- Blind hole tapping secrets — CNCCookbook
- Blind hole -Taps: Correct selection and use — BAER Tools