
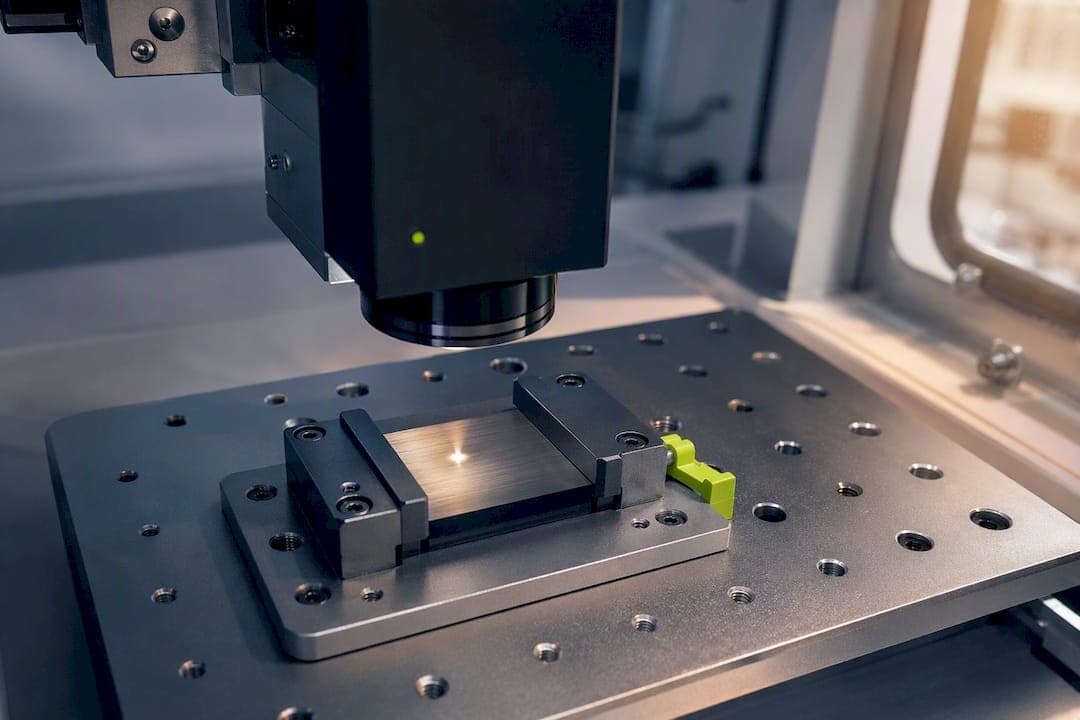
Laser marking handles most precision metal traceability jobs, dot peen and electrochemical etching cover hardened or wear-heavy parts, and inkjet or nameplates work when the surface has to stay untouched. The right call depends on five things: material, required durability, code density, what happens to the part afterward, and how many pieces you're marking.
TL;DR:
- Intrusive marks like laser engraving, dot peen, or electrochemical etching require metallurgical review if the part is load-bearing or fatigue-sensitive, impacting acceptance.
- Laser marking, annealing, etching, and engraving differ significantly in depth, heat effect, and durability, with laser processes offering high speed and no contact.
- Dot peen and stamping are suitable for rugged, impact-resistant markings on large, low-density codes, but are unsuitable for dense or tiny symbols on delicate parts.
- Electrochemical etching provides a risk-free means to mark hardened metals without heat or mechanical impact, ideal for tooling and final heat-treated parts.
- For maximum reliability, verify marking settings on actual material conditions, conduct thorough qualification tests, and ensure compliance with aerospace standards and downstream process requirements.
What Are the Main Part Marking Methods, and How Do They Differ?
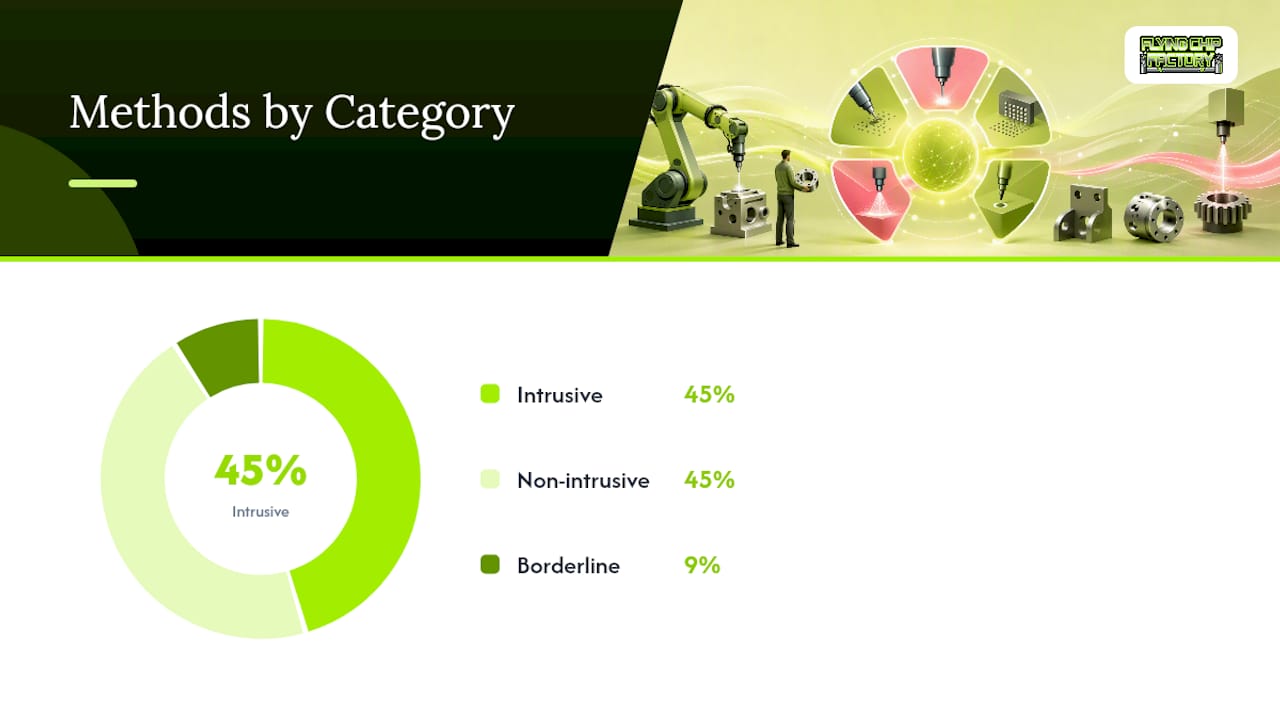
Every marking method falls into one of two buckets: intrusive or non-intrusive. Intrusive methods change the substrate itself, through material removal, deformation, or a controlled chemical reaction. Non-intrusive methods leave the base material alone, adding a mark on top or attaching it separately.
That distinction drives almost every downstream decision. NASA's handbook on direct part marking treats any intrusive mark as a controlled defect on aerospace hardware, which means it can require metallurgical evaluation before the part gets signed off. If you're marking a fatigue-critical bracket or a pressure vessel, that review step isn't optional paperwork. It's the difference between a part that passes inspection and one that gets scrapped.
Here's how the common methods sort out:
- Intrusive: laser engraving, dot peen, scribing, stamping, electrochemical etching
- Non-intrusive: laser annealing (mostly), inkjet/CIJ printing, screen printing, stencils, labels and nameplates
- Borderline: laser marking, which can range from near-surface oxide change to shallow material removal depending on settings
For anything load-bearing or fatigue-sensitive, start by asking whether the part can tolerate a stress riser at all. That answer eliminates half your options before you look at a single spec sheet.
Laser Marking, Engraving, Etching, and Annealing: What's Actually Different?
These four terms get used interchangeably in casual conversation and that's a mistake. They're different physical processes with different depth, different heat effect, and different durability outcomes.
Marking and annealing change the surface without removing material. Marking alters surface roughness or the oxide layer using less energy than engraving, producing a fast, low-heat mark. Annealing goes a step further, using controlled heat to change the metal's oxide layer and produce a color contrast, usually black on stainless, without cutting into the surface at all.
Etching and engraving remove or reshape material. Engraving vaporizes material and cuts a groove, typically reaching depths around 0.020 inches, though soft materials like graphite can go as deep as 0.125 inches. That depth is why engraving survives abrasive environments that would erase a surface mark within weeks.
Source type matters more than most shops realize. A single fiber laser can perform all four processes just by adjusting pulse duration, frequency, and power, but a MOPA laser gives finer pulse control than a standard Q-switched source, which is why MOPA dominates color annealing and fine gray-scale marking work.
Material matters just as much as the process:
- Stainless and titanium anneal well and hold a dark, corrosion-resistant mark without breaking the passive layer, worth checking against our stainless steel machining guide if you're marking after passivation.
- Aluminum marks cleanly but can show heat-affected zone (HAZ) discoloration around deep engraves; anodized parts need special attention since the coating itself is what carries the mark (see our hardcoat anodize thickness guide).
- Brittle or transparent substrates, glass among them, need process settings tuned specifically for the material; a partner resource on laser marking for glass components covers that case in more depth than most CNC-focused guides do.
Pro Tip: Never qualify a laser setting on one material and assume it transfers. A setting dialed in for 304 stainless will overheat and discolor 6061 aluminum, and it'll barely touch anodized coating. Requalify per material, every time.
Throughput and automation favor laser across the board. It's non-contact, requires no consumables, and integrates cleanly into automated cells. The most common qualification pitfall is treating the laser as set-and-forget, ignoring that a downstream shot peening or bead blasting step can erase a mark that looked perfectly readable off the machine.
When Should You Use Dot Peen or Scribe/Stamp Marking Instead?
Dot peen earns its place when you need a DataMatrix or dot-matrix code on a part that will see heavy handling, harsh chemicals, or high heat, situations where a surface mark won't survive but you can't justify laser equipment or throughput. A carbide or tungsten stylus strikes the surface repeatedly to build a grid of indented dots that a vision scanner reads back as a 2D code.
That mechanical action comes with real operational costs:
- Stylus wear is constant and accelerates on hardened steel, so budget for regular tip replacement and periodic depth checks.
- Fixturing has to hold the part rigid against repeated impact loads, which rules out thin-walled or flexible parts that would flex or crack under the strike.
- Dot peen struggles with very dense codes; the physical dot size has a practical floor, so tiny data cells on small parts often push you toward laser instead.
- The process is loud. If you're running it in a shared shop floor, plan for hearing protection and consider enclosure.
Scribing and stamping work similarly but trade code capability for speed. A scribe drags a single continuous line, good for simple alphanumeric text or logos, while a stamp impresses a full character or symbol in one strike. Both need substantial fixture loads to avoid part shift, and neither is a serious option for dense machine-readable codes. They're a solid, low-cost choice when you just need a part number or date code on a rugged component and don't need a scanner to read it.
Why Choose Electrochemical Etching for Hardened Parts?
Electrochemical etching solves a specific problem: how do you put a permanent, high-resolution mark on a fully hardened or heat-treated steel part without a laser's thermal load or a stylus's mechanical impact?
The process uses a stencil, an electrolyte solution, and a low-voltage current to transfer an image through controlled oxidation. Electrolyte-soaked felt pads sit against a stencil taped or clamped to the part, and current passing through creates a dark, high-resolution mark on the surface. It works on both soft and fully-hardened metals because the reaction depends on electrical conductivity, not surface hardness.
That's the real advantage over laser or dot peen: near-zero mechanical stress and no heat-affected zone, which matters on parts that have already been through final heat treatment and can't tolerate a stress riser or a HAZ discoloration ring. It's a common pick for tooling, gauges, and hardened fasteners where a laser anneal mark would look fine but a metallurgist would want proof it didn't touch the case hardness.
Process control comes down to a few practical steps:
- Stencil prep has to be precise since any gap lets the current bleed and blur the mark.
- Masking the surrounding area prevents stray etching outside the intended field.
- Post-etch cleaning removes electrolyte residue that can cause corrosion if left on the part.
- Electrolyte solutions require standard chemical-handling precautions: gloves, ventilation, and proper disposal per your safety data sheet.
Are Inkjet and Printed Labels Good Enough for Permanent Marking?
Sometimes, and that "sometimes" depends entirely on how you define permanent. Continuous inkjet (CIJ) printing is fast, flexible, and handles curved or textured surfaces that would trip up a rigid stencil. It's also the lowest upfront investment of any method covered here, according to Videojet's technical comparison of direct part marking approaches.
The catch is durability. Ink sits on the surface, so it's vulnerable to abrasion, solvents, and UV exposure unless you've validated the ink chemistry against your part's actual service environment. Consumable cost adds up too, since ink and solvent need regular replenishment that laser and electrochemical methods don't require.
Screen printing and stencil work suit repeatable graphics on flat surfaces, logos, warning labels, panel graphics, where you need a consistent visual mark rather than a scannable code. Nameplates and adhesive labels solve a different problem entirely: they're the right call when a part needs high-graphic content, multiple languages, or the ability to swap identification without remarking the part itself.
Before locking in any printed or applied mark, run these three checks:
- Abrasion resistance: rub testing against the expected handling and service contact.
- Solvent resistance: exposure to the actual cleaning agents or fluids the part will contact.
- Cure verification: confirm the ink or adhesive reached full cure before the part ships, since undercured marks fail early.
What About Micro-Abrasive Blast and Other Specialty Marking Methods?
Micro-abrasive blast marking earns a spot on niche jobs where you need surface texture control or glare reduction rather than a readable code. It works by directing fine abrasive media through a stencil to create a matte, low-reflectivity mark. Our bead blast versus sandblast comparison covers the texture side of this in more depth.
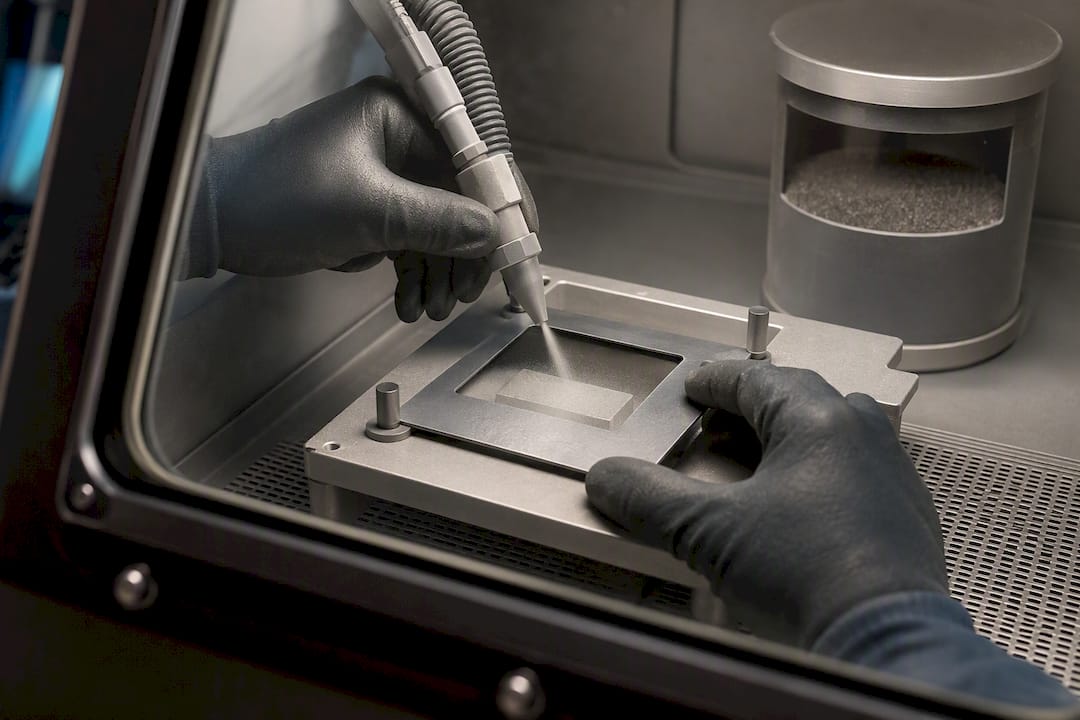
It has real limits: it doesn't perform well in humid conditions, on irregular shapes, or wherever particle contamination is a concern, which rules it out for clean-room parts or complex geometries.
Laser bonding and laser engineered net shaping (LENS) show up in additive or hybrid manufacturing contexts, building or fusing a mark into the surface rather than removing material. These are specialist processes. If your part combines exotic alloys, additive features, or a marking requirement outside anything covered here, loop in a materials specialist before committing to a process.
How Do You Choose the Right Marking Method for Your Part?
Run through this checklist before you commit to a process:
- Identify the material and its heat treatment state. Fully hardened steel points toward electrochemical etching or laser marking, not dot peen, which struggles on very hard surfaces.
- Check wall thickness and rigidity. Thin walls or flexible parts rule out dot peen and stamping outright; laser and electrochemical etching apply no mechanical impact.
- Confirm code density requirements. Dense DataMatrix codes on small real estate favor laser; dot peen has a practical floor on dot size that limits how small a code can go.
- Map downstream processing. If the part gets shot peened, bead blasted, or plated after marking, verify the mark survives that step, not just the one right after marking.
- Estimate volume and throughput needs. High-volume runs favor non-contact laser or CIJ; low-volume prototype work often tolerates dot peen or stamping without the equipment investment.
- Set minimum specs. As a starting point, character height should support your scanner's read distance, engraving depth should run deep enough to survive expected abrasion, and DataMatrix cell size should stay well above your scanner's resolution floor.
- Run a qualification sample. Mark a test part, scan it with your actual verification hardware, run abrasion and chemical resistance tests, and get sign-off before the process goes into production.
Pro Tip: Don't qualify your marking process on a finished, polished sample if the real part ships with mill scale, machining marks, or an as-cast surface. Contrast and readability change dramatically with surface condition, and a mark that scans perfectly on a clean coupon can fail on the actual production surface.
Which Standards Govern Part Marking and Verification?
NASA's handbook sets the benchmark for treating intrusive marks as controlled defects on aerospace hardware, with method-specific limits and verification steps worth referencing even outside aerospace work. AIM and ISO DataMatrix standards define minimum cell size and contrast ratios for machine readability.
Build verification into the process, not after it:
- Scan every mark with the actual verification hardware before the part leaves the marking station.
- Retain marking parameters, verification scan results, and any abrasion or chemical test data for traceability audits.
- Flag any mark applied before a downstream finishing step for a post-process readability recheck.
What Should Your Shop's Marking Checklist Cover?
Before a part hits the marking station, confirm the location clears fixture clamps, sits at least one character height from any edge, and doesn't fall on a wall thinner than your minimum spec allows. Sequence matters: mark before finishing operations like anodizing, but after any heat treatment that could distort a shallow mark.
A thin-walled bracket calls for electrochemical etching or light laser marking, never dot peen, which would deform the wall. A stainless pivot headed for passivation is a better fit for laser annealing, since the process changes the oxide layer without breaking the passive film underneath.
- Check edge distance and fixture clearance before programming the mark.
- Confirm marking order relative to heat treat, plating, and finishing steps.
- Verify minimum wall thickness against the chosen method's mechanical or thermal load.
Pro Tip: Proprietary performance data can demonstrate product durability and customer satisfaction from marking and finishing work.
A Shop Owner's Take on Marking Real Parts
Every marking call on the shop floor comes down to the same question: what does this part have to survive, and does the mark need to survive it too? Most failures trace back to skipping that question, not to picking the wrong laser setting.
— Drake
Where to Read More on Part Marking Standards
- NASA-HDBK-6003C, the controlled-defect and verification standard for intrusive marking on aerospace hardware.
- Videojet's technical guide comparing laser, CIJ, dot peen, and electrochemical etching for direct part marking.
- Laser Focus World's explainer on the physical differences between laser marking and engraving.
- Cougartron's electrochemical marking reference covering stencil-based etching on hardened metals.
If your next prototype or short production run needs a marking plan built around the part, not a generic setting, Flying Chip Factory works directly with engineers on fixturing, material selection, and marking placement from the first sample through production sign-off.
Sources
- Laser Marking vs. Engraving: Key Differences, Applications, and How to Choose - Xometry
- Electrochemical marking and etch - Cougartron
- NASA-HDBK-6003C (DPM and marking methods) - NASA
- Methods for direct part marking - Videojet technical guide
- Are laser marking and engraving the same thing? - Laser Focus World