
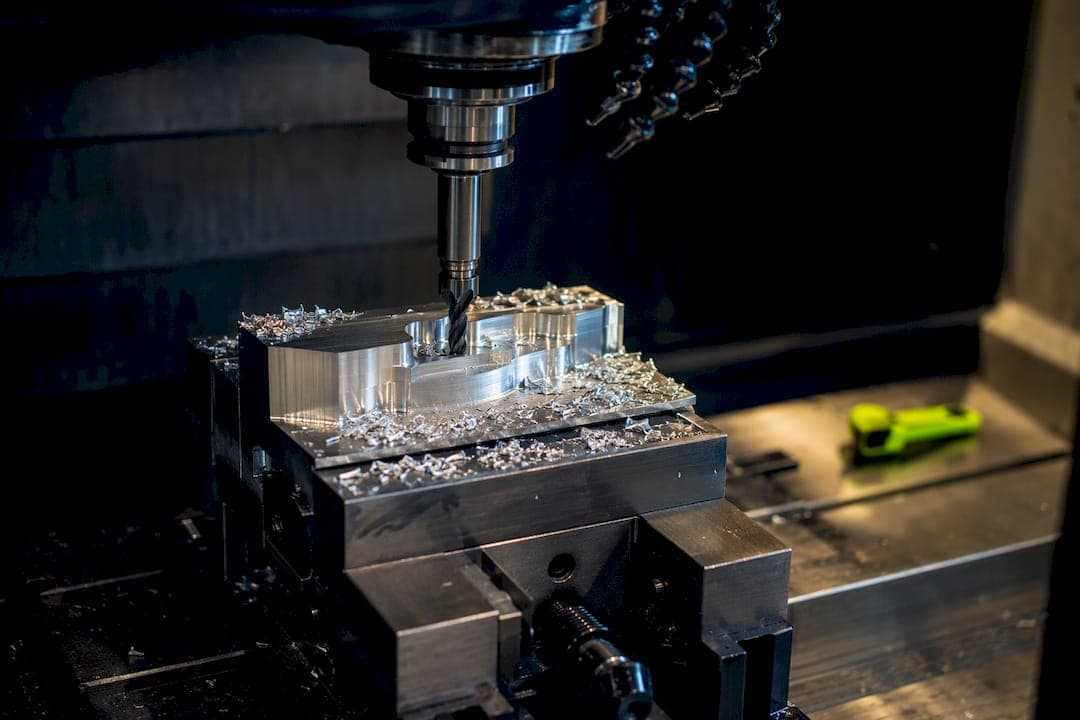
Soft jaws are machined, replaceable jaw faces that locate and support a workpiece with a profile ground into their own material. The single priority that governs every good soft jaw design is sequence: establish the datum before you clamp anything, size the contact to resist the actual cutting forces the job will see, and never let the jaw geometry block the tool. Reach for soft jaws whenever a part's shape, finish, or repeat volume makes generic hard jaws risky or slow to set.
TL;DR:
- Soft jaws are designed to match a part’s profile and are cost-effective only when used across multiple similar parts, not for single rough cuts.
- Designing soft jaws requires careful datum transfer, force-resisting contact areas, relief cuts, and tool access verification before machining.
- Aluminum is the default material for soft jaws, but steel lasts longer for high-volume runs, while brass and UHMW cater to finishing or delicate surfaces.
- Machining soft jaws should follow fixture best practices, including indicating the reference surface and testing fit before full production.
- Limit contact points to three generally, as more points can introduce errors, especially on castings or irregular shapes.
What Are Soft Jaws, and How Do They Differ From Hard Jaws?
Hard jaws are the stock steel jaws that came with your vise or chuck. They're hardened, general-purpose, and built to clamp raw stock or simple shapes. Soft jaws start as unhardened aluminum, mild steel, or brass blanks that you machine to match a specific part's geometry, then mount inside the same vise or chuck body.
That distinction is what makes soft jaws valuable. A hard jaw grips a flat or round surface with two or three points of contact and hopes friction does the rest. A soft jaw wraps around the actual part profile, so contact area increases and clamping force gets distributed instead of concentrated on two sharp edges. Soft jaws vs hard jaws reduce part marking and improve repeatability on irregular or thin-walled stock, though they cost setup time upfront.
Decision rules that hold up on most shop floors:
- Choose soft jaws when the part has an irregular profile, a finished surface you can't mark, or thin walls that hard jaws would crush.
- Choose hard jaws for raw bar stock, one-off roughing, or blanks where a rough grip is all you need.
- Choose soft jaws whenever the same part will run again, since the machining time amortizes across the batch.
When Do Soft Jaws Actually Pay Off?
Soft jaws earn their setup time on prototype-to-production transitions, short runs, thin-walled housings, and secondary operations where a part already has finished surfaces to protect. Anywhere a part needs to go back into the machine a second or third time, a soft jaw that locates it exactly the same way every time removes the guesswork a hard jaw can't.
They stop paying off on true one-off roughing jobs. If you're cutting a single bracket from a chunk of plate and never touching that geometry again, machining a dedicated jaw set costs more time than it saves. Save soft jaws for jobs with repeat value.
The payback math is straightforward:
- Machining a jaw set typically takes from a short to a moderate time depending on complexity and material.
- If that setup saves time per part on locating, indicating, and re-clamping, the break-even point lands after several parts.
- Beyond that run length, the soft jaw setup saves time on every part.
- Secondary ops (drilling, tapping, or finish milling on a part already partially machined) almost always justify a soft jaw, since a hard jaw risks marking a surface that's already been cut to spec.
A shop quoting a 50-piece run of a machined housing should build the jaw cost into the quote once, not per part. That's the logic behind quick-change fixturing that pays back within a year: the fixture is a one-time investment against a recurring job.
Core Design Principles: Datum, Force, Relief, and Access
Every soft jaw design decision traces back to four principles, and skipping any one of them is how a "simple" fixture job turns into scrapped parts.
- Locate before you clamp. Pick your datum surfaces off the print, not off convenience. Manufyn's soft jaw design guide treats jaw machining as fixture work, meaning the reference face you cut into the jaw has to transfer the part's real datum scheme, not an approximation of it.
- Design contact to resist expected cutting forces. A jaw that holds fine for a light finish pass can let a part walk under a heavy roughing cut. Size contact area and clamp pressure to the worst-case operation in the job, not the average one.
- Leave relief where it matters. Corners, chamfers, and any area the part doesn't need full contact should get relief cut into the jaw, both to avoid interference and to keep chips from packing between the jaw and the part.
- Confirm tool access and CAM strategy before you cut the jaw. A jaw profile that looks perfect on the CAD model can still block a boring bar or end mill from reaching a feature. Walk the toolpath against the jaw geometry before you commit.
Forum consensus among experienced machinists backs a simpler rule underneath all four: limit yourself to three solid contact pads, typically two on the fixed jaw and one on the movable jaw. More contact points sound safer but actually invite geometric error, especially on castings or forgings where flatness isn't guaranteed. That guidance comes straight from practical machinist discussion on soft jaw setups, and it lines up with how clamping force behaves in vacuum fixture design, where over-constraining a part creates the same rocking problem.
Pro Tip: Before you finalize a jaw design, sketch the part sitting in the jaw at its worst-case cutting force. If you can't point to which surfaces are actually resisting that force, your contact plan isn't done yet.
Materials and Grip Features: Matching the Jaw to the Job
Aluminum is the default soft jaw material for most CNC shops. It machines fast, it's cheap to replace, and it's forgiving enough that a mistake doesn't cost you a full day. The tradeoff is wear. Aluminum jaws deform faster under heavy clamping loads, so they're better suited to lighter parts or shorter runs.

Mild steel jaws cost more machining time upfront because the material cuts slower, but they hold their profile far longer under repeated clamping cycles. For a production run that will see the same jaw set hundreds of times, steel usually wins on total cost even with the slower initial cut.
Brass and UHMW plastic round out the material choices for specific cases:
- Brass works well when you need a softer contact surface that won't mark a finished aluminum or steel part, though it wears faster than steel under load.
- UHMW protects delicate or cosmetic surfaces almost completely but can't handle heavy clamping force or high-torque operations.
- Serrated jaw faces, often cut to standards like the 1.5 mm by 60 degree pattern documented on Haas Tooling's lathe jaw specs, increase grip on round or irregular stock without needing higher clamp torque.
- Jaw savers and bolt-on inserts let you swap the wear surface without remachining the whole jaw body, extending the life of an expensive custom jaw set.
Grip features change how much clamp torque you actually need. A smooth jaw face relies almost entirely on clamp pressure and friction, while a serrated or profiled face locks the part mechanically, letting you run lower clamp torque without sacrificing holding power.
How to Machine Soft Jaws: A Step-By-Step Strategy
Treat soft jaw machining exactly like fixture work, because that's what it is. The sequence below keeps a jaw job from turning into a guessing game on the second setup.
- Face and indicate the jaw reference surface first. This becomes your datum for every operation after it, so indicate it to the tightest number your machine can hold, not just "close enough."
- Rough the pocket or profile with generous stepovers, watching for heat buildup and deflection on thinner jaw sections. Soft jaws flex more than you'd expect on a first pass.
- Finish the profile with a light final pass, holding an allowance between .000 and .005 inches depending on how tight the part's own tolerance is. Tighter finished parts need tighter jaw allowances.
- Cut relief into corners and non-critical contact zones so chips and burrs don't create false contact points.
- Test-fit the part in the jaws before running production, checking for rock, gaps, or uneven contact with a feeler gauge or by hand pressure.
- Run a first-piece inspection against the print before releasing the job to full production.
CloudNC's Soft Jaw Designer, now built into Fusion, automates steps two through four by generating jaw cavities with allowances and relief already applied. Shop studies behind that tool claim it can cut fixture modeling time from roughly 30 to 60 minutes down to seconds in many cases, which matters most on shops running frequent one-off jaw sets rather than a handful of standard fixtures.
How Do You Verify a Soft Jaw Is Seated Correctly?
Verification isn't optional, and it isn't just eyeballing the part. Use a dial indicator to check the part sits flat and square against the jaw's locating surfaces before the first cut. Feeler gauges catch gaps a visual check misses. For higher-precision work, a CMM or in-machine probe confirms the part's actual position matches the CAM program's assumed position, which is the check that catches a jaw reference that drifted during rough machining.
| Symptom | Likely Cause | Corrective Action |
|---|---|---|
| Part moves during cut | Insufficient contact area or clamp force too low for the operation | Increase contact pad size or verify clamp torque against expected cutting force |
| Part rocks in jaws | Jaw reference surface not flat, or too many contact points fighting each other | Re-face jaw reference and reduce to three solid pads |
| Dimensional variation part to part | Chip buildup between jaw and part, or jaw wear | Clean jaws between parts; inspect jaw profile for wear and re-cut if worn |
| Chatter on finish pass | Part unsupported near the cutting zone | Add support pad closer to the cut, or reduce feed near that section |
Re-bore or replace jaws once you see consistent variation across parts that were previously holding tolerance, or once the jaw material shows visible wear at the contact points. A jaw that's out by a few thousandths at rest will be worse undercutting load.
Flying Chip Factory's Shop Notes on Soft Jaw Setups
At Flying Chip Factory in Athens, Alabama, soft jaw setups follow the same checklist on every job: verify the print revision, identify datums, cut and indicate the jaw reference, test-fit, then run first-piece inspection. On a recent aluminum housing secondary op, leaving corner relief and cutting only three solid contact pads kept the part from distorting under clamp pressure, a common failure point on thin-walled aluminum work.
Speed vs. Repeatability: An Editor's Take
Every soft jaw decision is a tradeoff between changeover speed and long-term repeatability. Three well-placed pads beat five clever ones almost every time. When a job's volume is uncertain, talk to the machinist during quoting, not after the first part comes off the machine.
— Drake
Where to Learn More About Soft Jaw Design
- Manufyn's CNC soft jaw design guide for step-by-step engineering detail.
- CloudNC's Soft Jaw Designer in Fusion for automated jaw modeling.
- Haas Tooling's lathe jaw specs for blank and serration standards.
- Anderson's guide to CNC workholding methods for datum-first fixturing logic.
Sources
- CNC Soft Jaw Design — Manufyn
- CloudNC Soft Jaw Designer: Automated Soft-Jaw Fixtures Now in Fusion — Autodesk
- Lathe jaws and soft jaws — Haas Tooling
- Soft Jaw best practices? — Practical Machinist forum
FAQ
What Does It Mean to Have a Soft Jaw?
A soft jaw is an unhardened, machinable jaw face that gets cut to match a specific part's profile, letting the vise or chuck locate and clamp that exact shape instead of relying on generic flat or round contact.
What Are Soft Jaws in CNC?
In CNC work, soft jaws are custom fixture faces machined in aluminum, mild steel, or brass and mounted in a vise or chuck to hold a part with repeatable accuracy across multiple operations. Manufyn's design guide treats this as fixture-grade work requiring careful datum transfer.
How Do You Make Soft Jaws?
Face and indicate the jaw reference surface first, rough the profile pocket, finish with a light allowance between zero and five thousandths of an inch, cut relief at corners, then test-fit and run a first-piece inspection before production. Tools like CloudNC's Soft Jaw Designer can automate the pocketing and allowance steps inside Fusion.
What Are the Key Differences Between Hard and Soft Jaws?
Hard jaws are hardened, general-purpose, and grip parts with minimal contact area, which works fine for raw stock but risks marking finished surfaces. Soft jaws are machined to the part's exact profile, spreading clamp force across more contact area and improving repeatability, though they cost setup time that only pays off on repeat or precision work.
Need a Custom Fixture or Jaw Set Machined?
A capable CNC shop can handle prototype machining, short-run production, and custom fixtures, brackets, and support parts directly, with no sales layer between you and the machinist doing the work. If your job needs a soft jaw set or a one-off fixture built right the first time, get a quote through Flying Chip Factory and talk through the setup before it hits the machine. Riders running a KTM SX-E 2, GASGAS MC-E 2, or Husqvarna EE 2 can also check out the shop's bolt-on E2 Kickstand, priced at $100 to $105, built with the same shop-floor standards described above.