
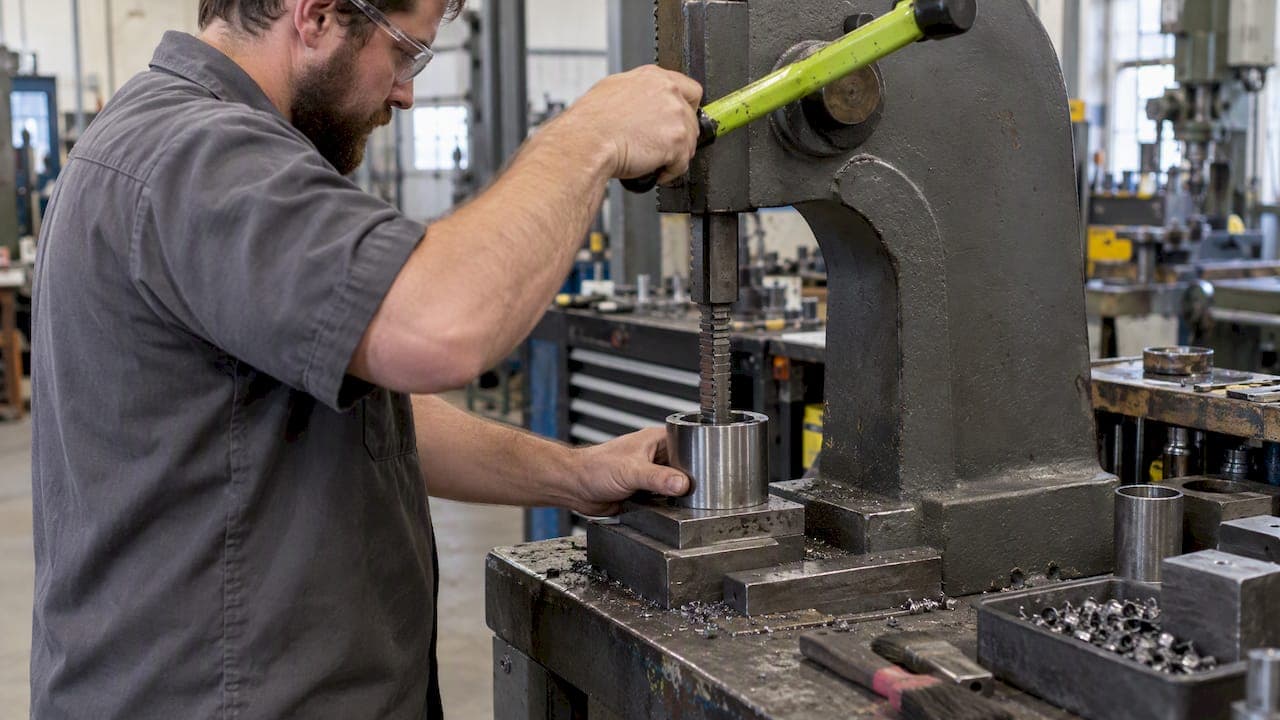
For small, repeatable internal keyways, use a push broach with a guided bushing. For long internal slots or deeper keyseats, pull broaching gives better control and part support. For single-part runs or odd corner radii, rotary broaching or a CNC groove cycle saves setup time. Each choice shifts fixturing needs, tooling cost, and lead time, so match the method to the job before you quote it.
TL;DR:
- Push broaches are ideal for small, repeatable internal keyways in softer materials and require minimal setup with an arbor press.
- Pull broaching is better suited for longer or deeper keyseats, offering better straightness over length but needing a sturdier machine setup.
- Rotary broaching allows quick, single-pass cutting of keyways or hex forms on lathes or mills, especially for prototypes or complex geometries.
- Proper fixturing and bushing fit are critical to prevent keyway drift, with worn or loose bushings causing oversize or misaligned slots.
- CNC turning platforms with integrated groove cycles offer flexible, high-precision internal groove production without dedicated broach tooling.
Types of broaches and keyway methods you can choose from
Push broaches, sometimes called solid broaches, are the workhorse for shops cutting internal keyways in small to medium bores. You drive the broach through the bore with an arbor press, using shims between passes to step up to final size. They're inexpensive, simple to maintain, and well suited to batch work where the bore diameter and keyway size repeat job after job.
Pull broaches work the other direction: the tool is drawn through the part rather than pushed. This matters for longer keyseats or harder materials, where push broaching risks buckling or deflection. Pull broaching needs a sturdier setup, usually a pulling head or hydraulic pull broach machine, but it holds straightness better over length.
Modular or insert broaches use replaceable carbide inserts instead of a solid high-speed-steel body. They cost more upfront but let you swap worn sections without scrapping the whole tool, which pays off on longer production runs or when cutting abrasive materials.
Rotary broaching skips the push/pull motion entirely. A rotating tool holder, often in a lathe turret or mill spindle, cuts the keyway or hex form in a single plunge. It's fast for one-off or low-volume parts and doesn't need a dedicated broach press.
- Push broaching: best for short, repeatable internal keyways in softer to medium-hardness stock.
- Pull broaching: best for long or deep keyseats needing straightness over length.
- Modular broaching: best for long runs where insert replacement beats re-tooling.
- Rotary broaching: best for single parts, prototypes, or awkward corner geometry on a lathe or mill.
Corner radii and size limits vary by method. Solid push and pull broaches typically hold tighter standard corner radii because the tool geometry is fixed at manufacture. Rotary broaching can approach tighter or custom radii on a part-by-part basis since the tool geometry is often ground to spec, but it trades some throughput for that flexibility.
Shop-ready workflows for each broaching method
Each method has its own sequence, and skipping a step is usually where scrap starts.
Push broaching on an arbor press:
- Bore the part to the specified pre-broach diameter and deburr both faces.
- Install a guided bushing sized to the broach body to keep the tool centered through the stroke.
- Stack shims under the broach to set the first pass depth, then press through in one smooth stroke.
- Clean chips from the keyway and bushing bore between passes.
- Repeat with thinner shims until the keyway reaches final width, checking fit with a go/no-go gauge.
Pull broaching on a press:
- Install the pull head or hydraulic fixture and confirm the bushing seats flush against the part face.
- Support the part so it can't rotate or lift during the pull stroke.
- Stage the broach through the bushing from the far side before engaging the pull mechanism.
- Pull through in a single continuous motion, monitoring load if the press has a gauge.
- Back out, inspect the slot, and swap to the next size broach if stepping up.
Rotary broaching on a mill or lathe:
- Mount the rotary broach holder in the spindle or live tooling station and align it to the bore centerline.
- Program or manually set the plunge depth for the finished keyway or hex depth.
- Run the plunge at the tool manufacturer's recommended speed, usually slower than typical milling feeds.
- Retract, clean the bore, and verify depth and width before releasing the part.
Rough or bore the hole to the correct pre-broach diameter before any of these sequences start. Pre-machining establishes the datum the broach rides against. If the bore is oversized, the keyway will shift off-center. For tighter bores before broaching, a bore-then-ream approach as described in boring and reaming to tight fits gives a cleaner starting surface than drilling alone.
Cutting fluid matters more than most new machinists expect. A sulfurized or chlorinated oil reduces galling on push and pull passes, and keeping stroke speed controlled, rather than ramming the tool through, protects both the broach edge and the finish.

Pro Tip: Run your first pass dry and slow on a scrap part to confirm bushing alignment before committing cutting fluid and a good broach to the job.
Choosing broaches, bushings, arbors, and fixture setup
Setup errors account for more scrapped keyways than worn tooling does. Start with the broach itself: solid high-speed-steel broaches suit shorter runs and softer materials, while modular carbide-insert broaches earn their cost on long runs or harder alloys where edge wear adds up fast.
Bushing fit is where a lot of jobs go wrong. A bushing that's too loose lets the broach wander mid-stroke, producing a keyway that's wider on one end. A bushing that's worn oversized from repeated use will let the broach drift the same way, so measure bushing bore diameter periodically rather than assuming it's still true.
- Match broach shank-to-bushing clearance to the manufacturer's spec, typically a few thousandths, not a press fit.
- Use an arbor press for lighter push broaching jobs under a few tons of force; step up to a hydraulic press when pull broaching or working harder alloys.
- Check fixture squareness with a dial indicator before the first production piece, not after a batch runs out of tolerance.
- Confirm the part can't rotate or walk during the stroke, especially on pull setups where load is higher.
- Run a trial stroke on a sacrificial part and measure keyway width and depth before releasing the fixture for production.
Workholding stability affects both accuracy and broach life. Partner guidance on advanced workholding techniques covers fixturing approaches that cut vibration, which matters just as much on a broach press as it does on a mill spindle.
Machine platforms and broaching cycle options
An arbor press suits low-volume push broaching where force requirements stay modest and tolerances aren't aggressive. Once you need pull broaching, harder materials, or longer keyseats, a hydraulic press gives more consistent force through the stroke and reduces the operator fatigue that comes with manual arbor work.
Dedicated broaching machines, built specifically for the push or pull stroke, offer better throughput and repeatability on high-volume jobs than a general-purpose press. They're a capital investment that makes sense when keyway broaching is a recurring, not occasional, operation in your shop.
CNC turning and turn-mill platforms add another option entirely. DMG MORI documents CNC keyway broaching cycles that let operators input groove geometry, compensate for tool displacement, and calculate residual strokes directly in the control, producing internal and outer grooves without a dedicated broach tool. That approach is useful when a driven broach tool isn't economical for the batch size or when the machine already has the part loaded for turning operations.
- Arbor press: lowest cost, best for light push broaching on softer materials.
- Hydraulic press: better for pull broaching, harder alloys, or longer keyseats.
- Dedicated broaching machine: best throughput for recurring high-volume keyway work.
- CNC groove/broaching cycle: best when avoiding dedicated broach tooling or when the part is already chucked for turning.
Prefer a CNC cycle over physical broach tooling when run quantities don't justify a custom broach, or when the groove geometry is unusual enough that grinding a dedicated tool would cost more than the job is worth. Integrating inspection, whether a CMM check or an in-process gauge, catches bushing wear or tool deflection before it propagates through a batch.
Dimensional guidance: fits, stock, radii, and finish
Keyseat tolerances depend on the fit you're targeting. A clearance fit for a key that should slide and key a shaft without binding typically runs looser than a press fit, where the key needs to seat under interference. Confirm the governing standard for your application rather than assuming one tolerance class fits every job, since clearance and press-fit keyseats are specified differently by design intent.
Stock allowance before broaching should leave enough material for the broach to remove cleanly without starting from an undersized or oversized bore. Bore to the pre-broach diameter called out by the broach manufacturer, then finish-broach in the final pass rather than trying to hog out the full keyway depth in one stroke.
Minimum corner radii vary by method. Solid broaches are ground with a fixed corner radius, so the achievable minimum depends on the tool you buy. Rotary broaching can sometimes approach a tighter custom radius since the tool is ground to the job, but very sharp corners increase stress concentration in the finished part regardless of method, so check whether the design actually needs a sharp corner or can accept a standard radius.
CNC groove cycles reduce setup changes on turn-mill platforms. DMG MORI's keyway broaching cycle documentation describes parameterized tool compensation and residual-stroke calculation built into the cycle, which means less manual recalculation when groove geometry changes between parts.
- Confirm clearance versus press-fit tolerance class before cutting the first part.
- Leave adequate pre-broach stock allowance rather than cutting the bore to final size before broaching.
- Match corner radius to the broach or rotary tool actually on hand, not an assumed standard.
- Expect a rougher finish from roughing passes and plan a finish pass or secondary operation where surface quality matters.
- Check keyway width, depth, and squareness with go/no-go gauges or a CMM before the part leaves the station.
Diagnosing and fixing common broaching failures
Broach breakage usually traces back to one of three causes: too much stock removed in a single pass, a bore that's undersized for the broach, or chip packing that spikes the cutting load mid-stroke.
- Check pre-broach bore diameter against the tool spec before every run, not just the first part.
- Reduce stock removed per pass if the press load climbs noticeably partway through the stroke.
- Clear chips from the bushing and bore between passes to prevent packing.
- Slow the stroke speed if you're seeing chatter marks or a rough keyway wall.
- Stop the run and inspect the broach edge if the last part's finish degrades noticeably from the one before it.
Oversized slots usually point to a worn or loose bushing; undersized slots point to a broach that's been reground smaller than spec or shims stacked incorrectly. Rework options are limited once a keyway is cut oversized, so catching drift early with periodic gauge checks saves more parts than it costs in time.
Pro Tip: Log broach pass counts per tool. A sudden finish change after a predictable number of passes is a scheduling cue for resharpening, not a mystery to troubleshoot from scratch.
Flying Chip Factory's shop perspective on broaching decisions
In our own shop, the decision between broaching and milling a keyway comes down to volume and geometry. A one-off bracket usually gets milled since setting up a broach press for a single part rarely pays off. A repeatable feature across a production run, like a keyed shaft interface on a fixture, is a stronger candidate for push or pull broaching once the bushing and arbor are dialed in.
- We weigh broaching against milling the same way we weigh any process: tooling cost against run length.
- Fixture-heavy parts, including brackets and support components, often get the same alignment checks described above before any cutting starts.
- Our E2 Kickstand line is an example of a part where consistent fixturing and repeatable tolerances matter as much as the cutting method itself.
- Related process notes, including slot machining tradeoffs, are covered in our shop-ready guide to slot machining.
A keyed fixture bracket that needs the same slot cut across a production batch is a better broaching candidate than a one-off prototype, where milling or rotary broaching on existing live tooling is usually faster to set up.
Further reading and machine documentation
For cycle-level detail, see DMG MORI's keyway broaching cycle documentation. For related shop process guides, read our tight tolerance machining guide and reaming versus boring guide.
An editorial take on getting keyway broaching right
The advice that circulates most about keyway broaching focuses on tool geometry charts and textbook tolerance tables, and not enough on the fixturing and bushing checks that actually cause most scrapped parts. A broach ground to the correct spec still cuts an oversized slot if the bushing it rides in has worn loose, and that failure mode rarely shows up in general machining references.
What gets underrated is the trial stroke. Running one sacrificial part through a new setup before committing a production batch catches alignment problems that no amount of tool selection fixes after the fact. What gets overrated is chasing a slightly tighter corner radius or a marginally better surface finish spec when the part's actual function doesn't need it.
If you take one thing from this, prioritize the bushing and fixture check over the broach brand. The tool matters, but a worn bushing or a part that shifts mid-stroke will ruin a good broach's work just as easily as a cheap one's.
— Drake
Where Flying Chip Factory fits into your next keyway job
If you're weighing whether a part needs dedicated broach tooling, a CNC groove cycle, or a quick rotary setup, that's exactly the kind of decision we make daily running prototype and short-run jobs out of our Athens, Alabama shop. You work directly with the machinist who designs and builds the part, not through a sales layer, so questions about fixturing, tolerance, or run quantity get answered by the person actually cutting metal.

We offer prototype machining, short-run production, and fixtures, brackets, and support parts for engineers and small manufacturers who need a working part fast and clear guidance on what it will take to get there. If you'd rather see a finished example first, our E2 Kickstand for the KTM SX-E 2, GASGAS MC-E 2, and Husqvarna EE 2 shows the same fixture-first approach applied to a shipped product. Get in touch through Flyingchipfactory with your drawing or sketch and we'll tell you what the job actually needs.
FAQ
What are the different types of keyway broaches?
The main categories are solid push broaches, pull broaches, modular insert broaches, and rotary broach tools. Push broaches suit short repeatable internal keyways, pull broaches suit longer keyseats, modular broaches suit long production runs, and rotary broaches suit single parts or prototypes.
What are the different types of broaching?
Broaching methods are generally grouped as push broaching, pull broaching, surface broaching, and rotary broaching, with internal and external variants of each depending on whether the feature is inside a bore or on an outer surface. Shops also use CNC groove cycles, such as those documented by DMG MORI, as an alternative to a physical broach tool.
What are the different types of broaches?
Broaches are typically described by how they're driven (push, pull, or rotary) and by construction (solid high-speed-steel or modular carbide-insert). The right type depends on keyway length, part hardness, and whether the job is a one-off or a production run.
Can you broach on a mill?
Rotary broaching can be done on a mill using a rotary broach holder in the spindle or a live tooling station, cutting the keyway or hex form with a single plunge rather than a push or pull stroke. It works well for prototypes or low-volume parts where setting up a dedicated broach press wouldn't be worth the time.
When should I choose a CNC broaching cycle over a dedicated broach tool?
A CNC groove cycle makes sense when run quantities don't justify grinding or buying a dedicated broach, or when the part is already set up for turning operations. DMG MORI's keyway broaching cycle documentation covers how groove geometry and tool compensation are handled directly in the control for this kind of job.