
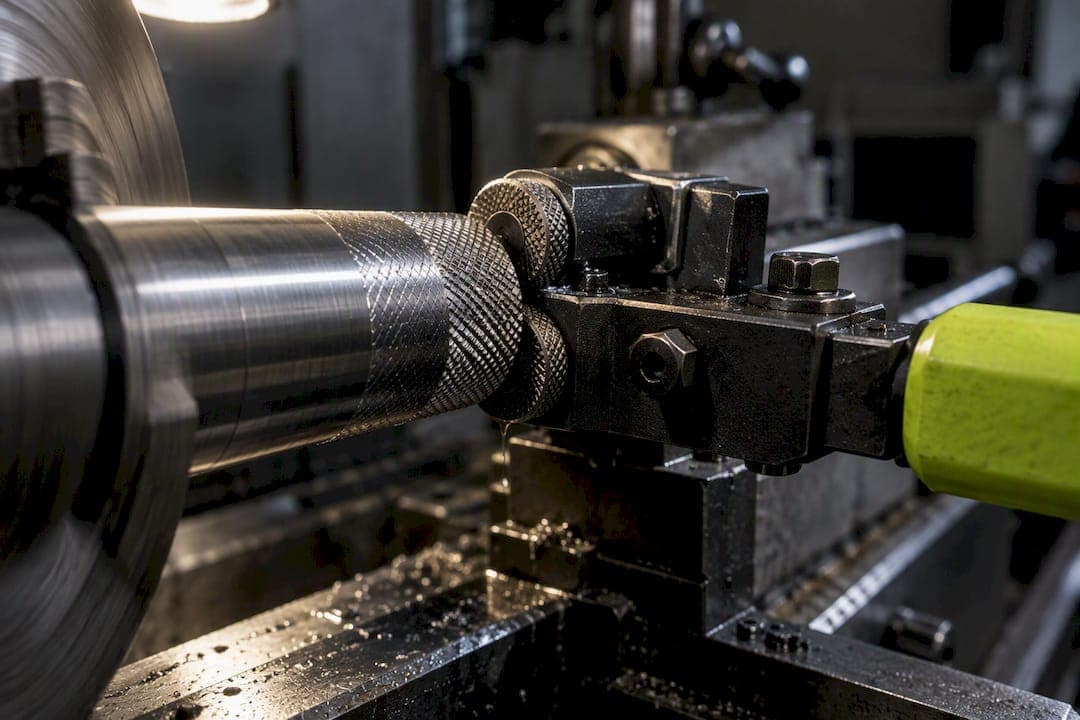
The main knurling patterns are straight, diagonal (left and right), and diamond, and the critical process choice is form versus cut: form displaces metal and grows the diameter, cut removes chips and leaves a cleaner edge on harder stock. Which pattern and process you pick depends on the grip function you need, the base material, and whether diameter growth is acceptable. Pitch and grade fine-tune the final feel and function.
TL;DR:
- Form knurling on ductile materials like mild steel is faster and cheaper, but causes diameter growth, requiring under-turning of the precursor diameter.
- Diamond patterns provide better slip resistance and are preferred for handles and grips that undergo multidirectional torque, while straight and diagonal patterns suit axial or directional grip needs.
- Use appropriate holders, such as scissors or straddle, to evenly distribute radial forces and avoid chatter or deformation during knurling.
- Starting at around 300 RPM with light infeed, using flood coolant, and performing a single, steady pass produce the most consistent and high-quality knurling results.
- For hardened or critical tolerance parts, cut knurling offers a cleaner finish and greater precision, while form knurling suits prototyping and short runs on softer materials.
Which knurling pattern types should you choose?
Straight knurling, coded RAA under DIN-style knurl codes, cuts parallel ridges along the axis. It is the standard choice for press fits, axial sliding grips, and knobs where you need traction in one direction without cosmetic flourish.
Diagonal knurling angles the ridges left or right (RBL or RBR), giving directional grip or a visual spiral effect. Machinists reach for it when a part needs to look deliberately styled or when a single rotational grip direction matters more than pure axial hold.
Diamond knurling crosses two diagonal cuts to form a raised (RGE) or depressed (RGV) diamond lattice, and it is the default for handles, grips, and any surface that gets twisted or pulled in more than one direction. The crossing pattern resists slipping better than a single diagonal or straight pass, which is why hand tools and control knobs lean on it so heavily.
Annular knurling, a less common variant, produces circumferential rings rather than axial or angled ridges, useful for specific decorative bands or retention features. Pitch and grade shape all of these regardless of pattern:
- Fine pitch: smoother feel, common on precision knobs and instrument grips.
- Medium pitch: the general-purpose choice for tool handles and control knobs.
- Coarse pitch: aggressive traction for press fits and heavy-duty grip surfaces.
Should you use form or cut knurling for this job?
Form knurling displaces metal radially, pushing material outward rather than removing it. Cut knurling removes chips like any other machining operation, leaving a crisper profile with less radial stress on the part.
- Form knurling: low tool cost, fast cycle time, but high radial load on the workpiece and spindle.
- Cut knurling: cleaner finish, works on hardened alloys where form knurling would skate or crack the surface, but needs more specialized tooling and slower cuts.
- Diameter behavior: form knurling grows the finished diameter, so you must under-turn the precursor diameter to hit a target nominal size.
One rule of thumb machinists rely on: guideline documents note that some knurl types follow roughly d2 ≈ d1 minus half the pitch, though the exact factor shifts with pattern and material, so trial cuts on sample stock remain the safest way to confirm the final diameter.
For prototype work, form knurling is usually the faster, cheaper answer when the material is ductile and a small diameter change is tolerable. For hardened alloys or tight tolerance stacks, cut knurling earns its extra setup time.
What tools and holders handle each knurling job?
Tool choice follows directly from the form versus cut split, and the holder you mount matters as much as the wheel itself.
- Single-wheel bump holders are simple and inexpensive but push all the radial force into one side of the part, which makes them best suited to stout, well-supported shafts rather than slender stock.
- Scissor or straddle two-wheel holders balance the forces from both sides simultaneously, producing a cleaner pattern with less deflection, and they are the standard choice on smaller lathes where rigidity is limited.
- Self-adjusting or revolving heads compensate automatically for minor misalignment, which keeps the pattern consistent across a production run without constant operator correction.
- Cut knurlers remove material instead of displacing it, making them the right call on hardened stock or anywhere form knurling would just burnish and slip.
- Swiss-type mini knurl systems support micro knurls down to roughly ø0.5 mm with pitches around 0.1 mm, according to the Ifanger Swiss-Knurl catalog, opening up small-diameter parts that standard wheels cannot reach.
Mounting also matters: end-feed holders traverse axially into the part, while plunge holders press straight in radially, and Swiss-lathe guide bushings constrain shank size and reach in ways that standard turret tooling does not.
How do you specify a knurl correctly on a drawing?
DIN-style codes give you a shared language for calling out exactly what you want. RAA marks straight knurling, RBL and RBR mark left and right diagonal, and RGE and RGV mark raised and depressed diamond patterns, according to the DIN 82 knurling standard.
A callout like RBL08*45° tells the shop it is a left-hand diagonal knurl with a pitch of 0.8 mm and a rotation angle (β) of 45 degrees. Tooth angle (α) describes the profile ground into the wheel itself, while rotation angle (β) describes how that wheel tracks around the part, and confusing the two is a common source of print disputes.
Because forming knurls displace material, the precursor diameter (d2) must run smaller than the finished nominal diameter (d1). The exact offset depends on pitch and pattern, so shops typically confirm it with a trial cut before committing a production batch.
- Call out the pattern type using the DIN letter code.
- Specify pitch and width explicitly, not just "knurled."
- State the rotation angle for diagonal or diamond patterns.
- Note the tolerance band you expect on the finished diameter.
What speeds, feeds, and setup steps produce a repeatable knurl?
Start slow. Practitioners on machining forums commonly report starting around 300 RPM for form knurling on 3/4 inch 1018 steel, according to a CNC lathe knurling discussion, which gives the wheel time to bite cleanly before you push speed up.
End-feed technique traverses the wheel along the part in a single pass, which tends to produce a more uniform pattern than repeated plunge passes that can double-track and blur the ligaments. Infeed depth in the range of 0.003 to 0.010 inch is a common starting point, adjusted for pitch and material.
Flood coolant reduces flaking and extends wheel life, especially on form knurling where the metal is being pushed rather than cut. Ductile metals like mild steel and aluminum take form knurling well; harder alloys and some stainless grades often need to switch to cut knurling to avoid cracked or torn ligaments. Plastics and small-diameter parts usually call for lighter infeed and slower speeds regardless of pattern.
Pro Tip: Run one throwaway sample at your planned speed and infeed before committing to the production part, especially on a new material or pitch combination.
A commonly cited starting point: roughly 300 RPM for forming knurls on 3/4 inch 1018 steel, used as a baseline before dialing in speed for your specific pitch and pattern.

What are the most common knurling mistakes?
Most knurling defects trace back to a handful of repeat offenders.
- Misalignment: a knurl that looks doubled or offset usually means the tool was not centered on the workpiece axis; recenter and re-cut before adjusting feed.
- Wrong holder for the diameter: heavy chatter or a bent part after knurling often points to a single-wheel bump holder pushing too much radial load; switch to scissors or straddle holder.
- Multiple light passes instead of one solid pass: repeated passes tend to blur or double the ligaments; aim for a single, well-set pass instead.
- Work hardening and flaking: if the surface starts flaking or the wheel skates without biting, the material may be work-hardening under form knurling, which signals it is time to switch to a cut knurler.
- Skipping inspection: check ligament width, burr height, and the finished nominal diameter against print tolerance before calling the part done.
Prototyping and short-run knurling trade-offs
Knurl specs printed on a drawing get misread more often than machinists expect. When a knurl is critical to fit or feel, request a one-off sample before committing to a full run, since pattern appearance shifts with wheel choice and holder type even at the same nominal pitch.
In short-run work, form knurling wins when the material is soft, the diameter change is acceptable, and turnaround speed matters more than a mirror finish. Cut knurling gets quoted when the stock is hardened or the tolerance stack cannot absorb form knurling's diameter growth.
When you send an RFQ, include the DIN-style pattern code, pitch, width, and rotation angle rather than just the word "knurled," and note whether holder type (straddle versus end-feed) matters to the finished look.
— Drake
Building parts that need a knurl done right
If you are prototyping a part that needs a knurled grip, a knurled press fit, or a control surface with a specific feel, getting the pattern and process right on the first cut saves a redo cycle. Prototype machining, short-run production, and fixture and replacement part fabrication are often handled by shops that provide direct access to the machinist handling your job, so a knurl spec question gets answered by the person actually running the wheel, not relayed through a sales layer.
A similar in-house approach built a bolt-on E2 Kickstand for electric mini dirt bikes, designed and machined start to finish under one roof. If your project involves a knurled feature, a fixture, or a short production run, request a quote for prototype or short-run machining, or check out the E2 Kickstand product page to see the kind of finished part that comes out of our shop.
Sources
For deeper reference, the Dorian knurling tools catalog lists wheel families by application, and manufacturing teams tracking tool life data can pair that catalog with a pilot to monitor wheel wear over a production run.
- Ifanger / Swiss-Knurl system (knurling catalog)
FAQ
What are the three types of knurling?
The three most commonly listed patterns are straight, diagonal, and diamond, with diagonal splitting further into left-hand and right-hand versions. Straight suits axial grip and press fits, diagonal suits directional or decorative grip, and diamond suits multidirectional grip on handles and knobs.
What are the different types of knurling styles?
Beyond the core straight, diagonal, and diamond patterns, styles also vary by process: form knurling displaces metal, while cut knurling removes it as chips. DIN-style codes like RAA, RBL, RBR, RGE, and RGV, described in the DIN 82 knurling standard, give each pattern and orientation a standard label.
What are common knurling mistakes?
The most frequent mistakes are poor centering, using a single-wheel holder on a part too slender for the radial load, and running multiple light passes instead of one solid pass. Work hardening and flaking on harder materials are also common signs that the job should have used a cut knurler instead of a form knurler.
What RPM should you knurl at?
There is no single correct RPM since it depends on pitch, pattern, and material, but practitioners commonly start form knurling around 300 RPM on 3/4 inch 1018 steel and adjust from there. Starting slower and running a single solid pass tends to produce a cleaner, more consistent pattern than pushing speed on the first attempt.