
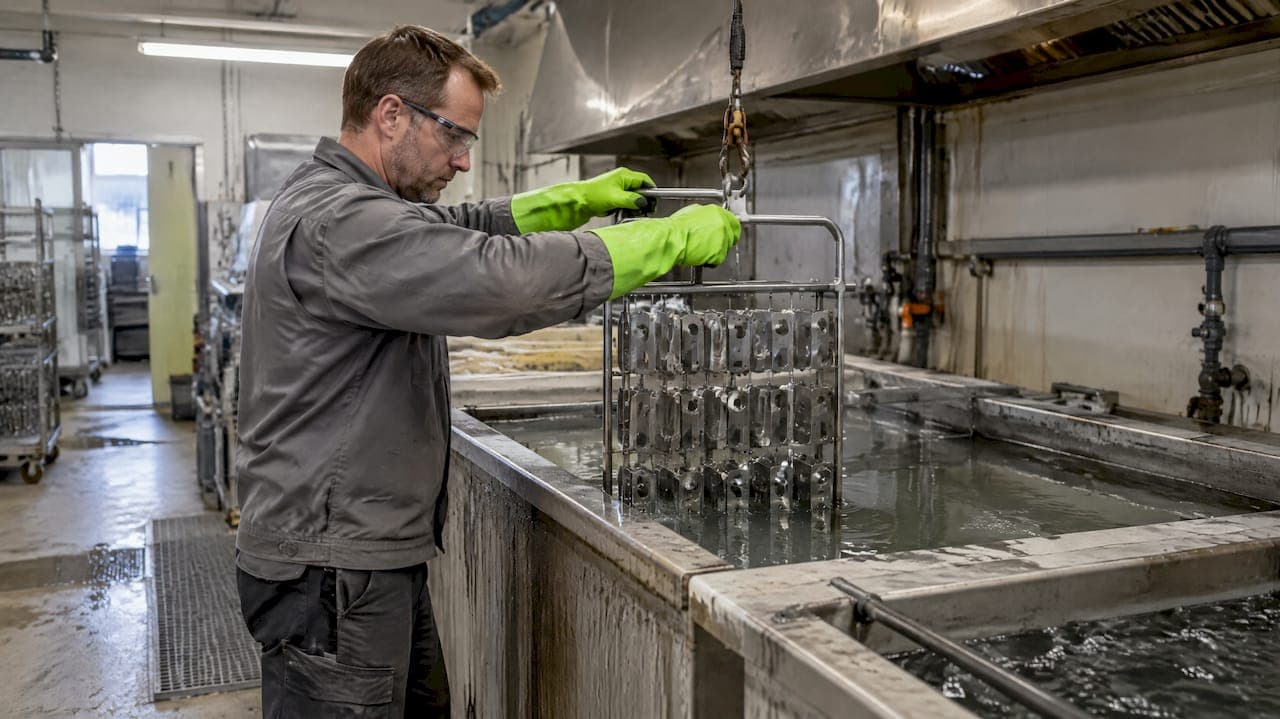
Stainless passivation is a chemical treatment that enhances the chromium-oxide film already present on stainless steel, restoring corrosion resistance without removing meaningful material. It applies mainly after welding, machining, or fabrication, especially on oxygen-starved geometries like crevices and blind holes. It does not remove scale or heat tint; that requires pickling or mechanical cleaning first, and electropolishing is a separate route when surface smoothing or slight dimensional change is acceptable.
TL;DR:
- Use specific ASTM A967 treatment codes, either nitric or citric acid, based on alloy and waste handling, to ensure consistent passivation quality.
- Mechanical cleaning or pickling is necessary before passivation if scale or heat tint remains, as they prevent the process from restoring corrosion resistance.
- Regularly verify bath conditions, chloride levels, and lot traceability to prevent contamination and ensure reliable passivation results during production.
- Water-break and copper sulfate tests are quick field methods to confirm surface cleanliness, but lab corrosion tests provide more definitive verification for critical environments.
- Electropolishing can improve corrosion resistance and surface smoothness but involves higher costs and geometry limitations, making chemical passivation preferable for short runs.
What passivation is and when you need it
Stainless steel resists corrosion because chromium at the surface reacts with oxygen to form a thin, self-healing oxide film. Problems start when fabrication disrupts it.

Machining leaves embedded iron particles from tooling, handling introduces oils and fingerprints, and welding drives off chromium near the heat-affected zone while leaving a visible tint. Any of these can create a surface that looks finished but corrodes prematurely once the part goes into service.
Engineers typically call for assisted chemical passivation when one or more of these conditions apply:
- Free iron or tool-steel residue is embedded in the surface from drilling, turning, or grinding.
- Welded joints show heat tint or oxide discoloration that was not fully removed.
- Parts have tight crevices, blind holes, or low-oxygen geometries where the passive film struggles to reform on its own.
- The application involves marine, medical, food-contact, or other environments where any point of corrosion is unacceptable.
Passivation will not fix a part that still has scale or heat tint on it. That contamination has to come off mechanically or through pickling before a passivation bath can do its job, a distinction that trips up a surprising number of shops.
Which standards and tests belong on the drawing
Vague callouts like "passivate per standard practice" invite inconsistent results. Put specific references on the drawing and RFQ instead.
- ASTM A967 covers passivation treatments for stainless parts, including both nitric and citric acid procedures with defined concentration, temperature, and time codes.
- ASTM A380 addresses cleaning, descaling, and surface conditioning of stainless steel, which usually has to happen before passivation can be verified.
- AMS and NASA process specifications define multiple passivation types, require regular bath analysis, and set chloride limits for sensitive alloys.
For verification, three tests dominate shop floors: the water-break free test (checks whether water sheets evenly across a clean surface), the copper sulfate test (flags exposed free iron through a color change), and salt fog or immersion corrosion testing for lots that need lab-level confirmation. AMS 2700 organizes these into acceptance classes, so specifying a class number, not just "passivated," gives suppliers an unambiguous target. Batch records should show solution analysis frequency, chloride concentration, and lot traceability so any rejected part can be traced back to a specific bath run.
Choosing between nitric acid and citric acid passivation
Both nitric and citric acid passivation are governed by ASTM A967, and both work by dissolving surface-embedded iron and encouraging the chromium oxide layer to rebuild. The choice between them usually comes down to the alloy, the shop's waste handling setup, and how much risk is acceptable around strong oxidizers.
- Nitric acid treatments run at various concentrations and temperatures depending on the specified code, and they have decades of field history across aerospace and medical applications.
- Citric acid treatments, also codified in ASTM A967 with their own temperature and time ranges, produce comparable chromium-to-iron surface ratios while generating far less NOx emission and simpler neutralization waste.
- Electrochemical or specialty methods exist for alloys or geometries where immersion baths are impractical, though these are less common in general fabrication shops.
Citric acid has gained ground in recent years largely because it is easier and safer to handle, with fewer fumes and a simpler disposal path than nitric baths. Neither method should be used on diffusion-hardened, carburized, or chloride-contaminated surfaces without engineering sign-off, since the acid can attack a hardened case or trigger pitting on an already-compromised surface.
Any passivation line needs fume capture over the tanks, a neutralization step before spent solution leaves the building, and a written procedure for chloride monitoring, since even small chloride carryover between baths can undercut the entire treatment.
Pro Tip: Specify the exact ASTM A967 treatment code (not just "nitric" or "citric") on the drawing so every supplier runs the same bath chemistry and time.
Electropolishing versus chemical passivation
Electropolishing is an electrochemical process that removes a controlled layer of metal while smoothing microscopic peaks on the surface, and it can function as a passivation method in its own right. Lab data shows typical material removal of 5 to 10 microns, with heavier smoothing passes removing up to about 50 microns, governed by ASTM B912. That same research associates electropolishing with notably better corrosion resistance and surface smoothness compared with untreated parts, and industry discussion confirms that electropolishing performed to ASTM B912 can provide corrosion resistance that may reduce the need for a separate chemical passivation step.
- Electropolishing changes part dimensions measurably, which chemical passivation does not.
- It tends to outperform chemical passivation on corrosion resistance and surface cleanliness, making it attractive for sanitary and medical applications.
- It costs more and takes longer per part than a nitric or citric dip.
- Not every geometry works: deeply recessed bores or faying surfaces can be hard to reach with the cathode placement electropolishing requires.
For a short run of parts where dimensional tolerance is tight, chemical passivation is usually the simpler path. For cleanliness-critical assemblies where a few microns of removal is acceptable, electropolishing can replace or complement it.
Preparing the surface before passivation
Pickling and passivation are not the same operation, and conflating them is one of the most common specification errors we see. Pickling actively removes metal, scale, and heat tint using stronger acid mixtures, usually nitric-hydrofluoric blends. Passivation uses a milder oxidizing bath that does not meaningfully remove base metal; it only cleans and restores the oxide film. Skipping pickling and going straight to passivation leaves chromium-depleted heat-affected zones in place, and BSSA's technical guidance confirms that incomplete heat-tint removal leaves exactly those depleted zones with sharply reduced pitting resistance.
Common removal methods include:
- Mechanical grinding or blasting to strip visible tint and scale from weld zones.
- Paste or gel etchants applied directly to welds for localized cleaning.
- Full immersion pickling baths for parts with extensive welding or heavy scale.
- Electrochemical cleaning for precision parts where mechanical abrasion risks damaging tolerances.
Hidden weld faces, internal crevices, and overlapping joints deserve extra attention, since contamination trapped there will not show up on a visual inspection but will still undermine corrosion resistance in service.
Pro Tip: A clean, shiny weld is not proof the chromium-depleted layer is gone. Color alone is not a pass/fail criterion; run a water-break or copper sulfate test before signing off.
Running a passivation line without surprises
Repeatable passivation depends on bath discipline, not just following a recipe once. Shops running production volume should check bath concentration and temperature regularly against the specified ASTM A967 or AMS code, and track chloride levels closely, since PRC guidance calls for weekly bath analysis and chloride verification on sensitive alloys.
- Test and log bath chemistry and temperature on a fixed schedule, not only when something looks off.
- Degrease and rinse parts thoroughly before the bath to avoid introducing oils or machining fluid into the solution.
- Keep lot traceability records tied to the specific bath batch each part passed through.
- Flag heat-treated, carburized, or diffusion-hardened parts for engineering review before they ever reach the tank.
Chloride control matters more than most shops assume: AMS/PRC process specifications mandate specific chloride limits and bath verification steps precisely because excess chloride carryover can defeat an otherwise correct passivation treatment. Documentation showing bath analysis dates, chloride readings, and lot numbers is often what separates a supplier's parts from getting flagged during incoming inspection.
How to verify passivation actually worked
A water-break free test is the fastest check: rinse the part, let a continuous film of water run across the surface, and if it sheets evenly without beading, the surface is clean enough to be considered passivated at a basic level. Beading indicates residual oils or contamination that needs another cleaning pass.
- The copper sulfate test exposes free iron by producing a copper-colored stain where exposed iron reacts with the solution, a quick field check for leftover contamination.
- False negatives can occur if the test solution is old or improperly mixed, so fresh reagent matters.
- For critical applications, specify a lab corrosion test such as ASTM G48 pitting resistance alongside an AMS 2700 class designation rather than relying on field tests alone.
- Lot sampling plans should define how many parts per batch get tested and what failure rate triggers a full lot rework.
A shop's honest take on passivation choices
For short runs, we lean toward citric acid passivation when the part geometry allows it, since it is gentler to handle and still meets ASTM A967 acceptance criteria. Electropolishing earns its keep on cleanliness-critical parts where the extra cost is justified by better corrosion performance, not as a default upgrade.
The biggest mistake we see is a drawing that says "passivate per standard" with no treatment code, no test method, and no acceptance class, which leaves every shop interpreting it differently. Specify the exact method and test, and keep the conversation with whoever is running your parts direct and specific.
— Drake
Getting passivated stainless parts built right
We machine prototypes, short runs, and fixtures from stainless and other alloys in-house, and we coordinate finishing steps like passivation directly with the machinist running the job.

- Each job carries lot traceability and test documentation so acceptance criteria are easy to verify.
- Our E2 Kickstand shows the kind of precision stainless work and finish quality we build to.
- For a finishing workflow reference, see this step-by-step polishing process covering related surface treatments.
If you need prototype or short-run stainless parts with documented passivation, request a quote and we will walk through the method and test callouts with you directly.
FAQ
Does 316 stainless steel need to be passivated?
Stainless steel self-passivates in clean, oxygenated conditions, but welding, machining, or crevice geometry can disrupt that film and call for assisted passivation. Marine and medical applications in particular often specify passivation per ASTM A967 regardless of alloy grade.
How do you passivate stainless steel?
Parts are first cleaned and pickled to remove scale, oil, and heat tint, then immersed in a nitric or citric acid bath per a specified ASTM A967 treatment code. After rinsing, a water-break or copper sulfate test confirms the surface is free of residual contamination.
What happens if stainless steel is not passivated?
Embedded iron particles, heat tint, or machining residue can create localized corrosion sites that spread even though the surrounding stainless looks unaffected. Electrochemical testing shows untreated heat-tint zones have sharply reduced pitting resistance compared to properly cleaned and passivated surfaces.
Can I passivate stainless steel at home?
Nitric acid passivation involves hazardous fumes and strict neutralization requirements that are not practical outside a controlled shop setting. Citric acid formulations are gentler, but without bath testing equipment and documented procedures there is no way to verify the result meets any recognized standard.
Sources
- Electropolishing and corrosion resistance (PMC article)
- Process Specification for Passivation and Pickling of Metallic Materials (NASA PRC)
- Passivation of stainless steels — BSSA
- Pickling and Passivating Stainless Steel (BSSA technical note)
- Finishing